Introduction
ReactJava provides the ability to create React web applications using the Java programming language. In an upcoming release, it will also automatically port any ReactJava web application to iOS and Android for deployment as a native application on mobile devices.
ReactJava is not a framework in its own right; it is simply a lightweight front-end providing access to the standard React framework from Java.
ReactJava was initially created as an educational aid for Advanced Computer Science high school students in which Java is taught as the sole programming language in compliance with the College Board national curriculum. The intention was to allow students fluent in Java but inexperienced in Javascript the ability to leverage all the power of React, lightweight, declarative, performant, component-based programming that is simple to write and easy to debug, packaged in a way that naturally combines the structure, familiarity, and reach of Java.
Despite its initial focus on computer science education, it has emerged as a tool of more general interest in its own right to a broader developer community. Although we make no claims that the developer experience with ReactJava is generally better than that of normal React, some may find it appealing to be able to use Java with its inherent structure, rich set of robust, industrial-strength tools, leveraging the enormous collection of existing Java libraries to build the same great applications for mobile and the desktop that is done normally with React and React Native.
Getting Started
This page will help you install and build your first ReactJava app. The assumption throughout the guide is that you will be using IntelliJ Ultimate Edition as an IDE, but you can make adjustments to use other IDEs or even just the command-line.
If you do not already have IntelliJ installed...
Download the IntelliJ Ultimate addition and follow the installation instructions.
Get the ReactJava IntelliJ Plugin...
Once you have IntelliJ installed, go to Intellij->Preferences->Plugins and choose the Marketplace tab to search for the 'ReactJava' plugin. Press the button to install it and then press the button to restart the IDE
If you do not already have a JDK installed...
You will need a Java Development Kit installed. You can check if you have one from the terminal:
> javac -versionIf you have a JDK installed, the version number will be displayed. Otherwise, install the Java 8 OpenSDK from Azul Systems.
If Building Native Apps on a Mac ...
Be sure you have the latest version of Xcode, complete with Command-line Tools. This is only necessary for Release 2.0 and later of ReactJava
If you do not already have Node installed...
Go to nodejs.org and follow the instructions to download and install node.
Create a new ReactJava IntelliJ Project...
Once you have all of the above installed, create-reactjava-app is the easiest way to start building a new ReactJava application. Use npm from the terminal to install the create-reactjava-app package (sudo is required on Mac):
> [sudo] npm -g i create-reactjava-appFrom then on, whenever you want to create a new ReactJava application,
> create-reactjava-app [pathToYourNewReactJavaProjectFolder]The result will be a ReactJava project folder that you can open in IntelliJ.
Updating an existing ReactJava project...
You can update an existing project with any React, ReactJava and React Native updates at any time by
> create-reactjava-app update [pathToYourNewReactJavaProjectFolder]or if your working directory is currently the project folder you wish to be updated, simply
> create-reactjava-app updateRestrictions on ReactJava project packages...
New Java classes and interfaces with package names that start with the following prefixes are not compiled by the ReactJava GWT compiler and should be avoided:
      "com.giavaneers.net",
      "com.giavaneers.util",
      "com.google",
      "io.reactjava.client.core",
      "io.reactjava.compiler",
      "elemental2",
      "core",
      "java",
      "javax",
      "jsinterop",
      "org.jsoup"
Working with the new ReactJava project
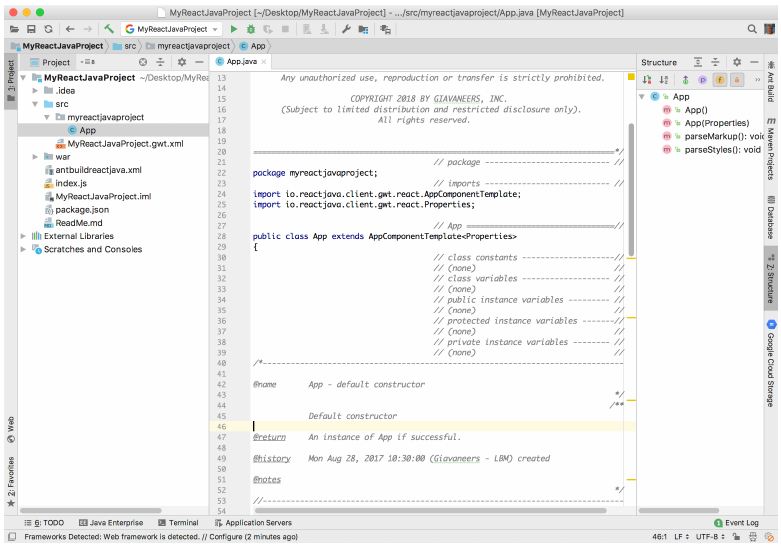
You can open the new ReactJava project folder with IntelliJ.
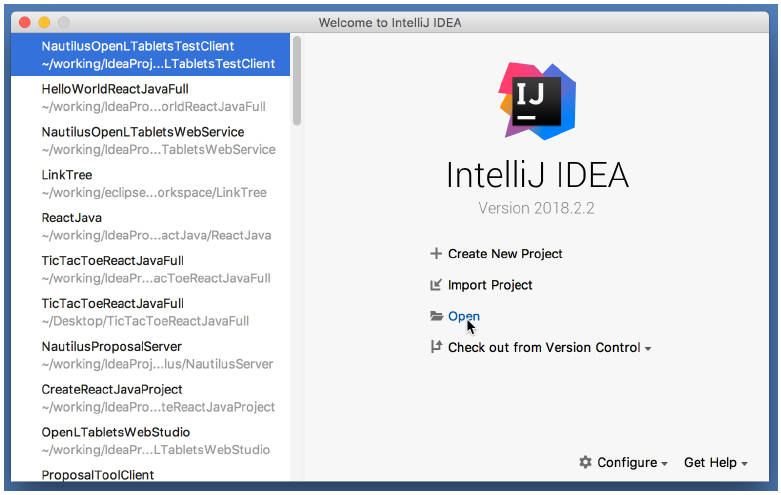
Select the new project folder and the project will open
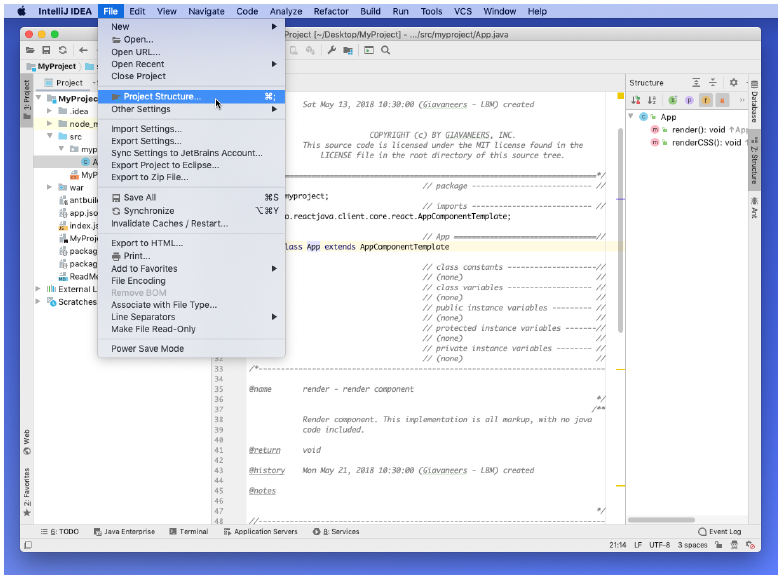
Open the project settings:
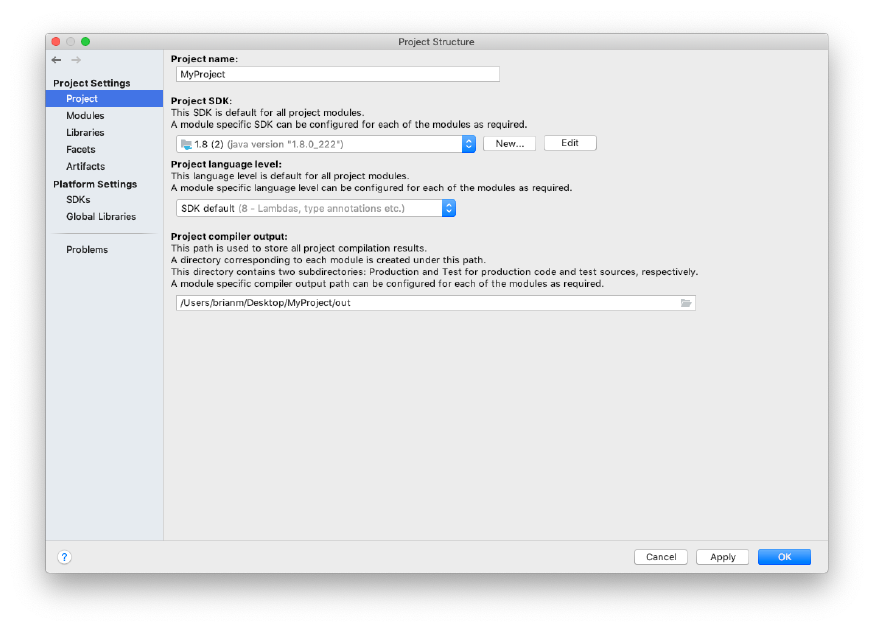
Make sure the Java 8 JDK is selected and the language level is set to 8.
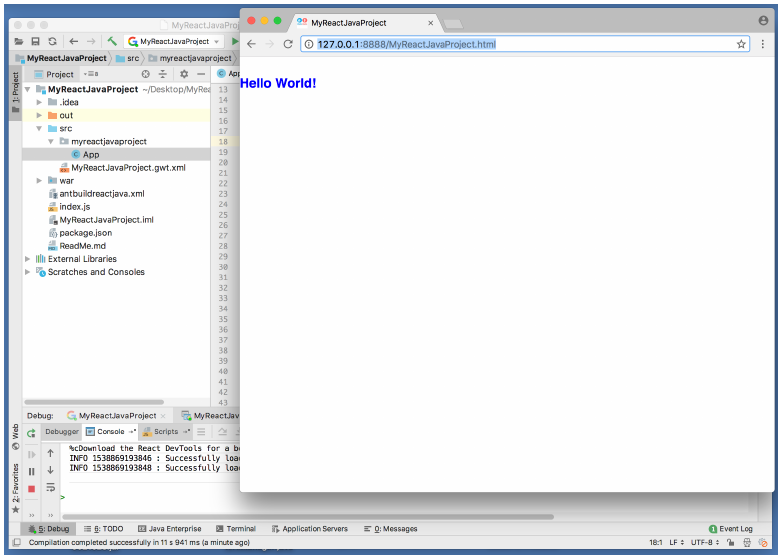
You can build and run the project in the debugger with a single click.
Use the project run/debug configuration to build and launch the application. The legacy source-header screenshot is omitted from this public edition.
When the app starts, the browser should launch and the app should appear.
ReactJava Project Structure
Some of the important project files are shown in the following figure.
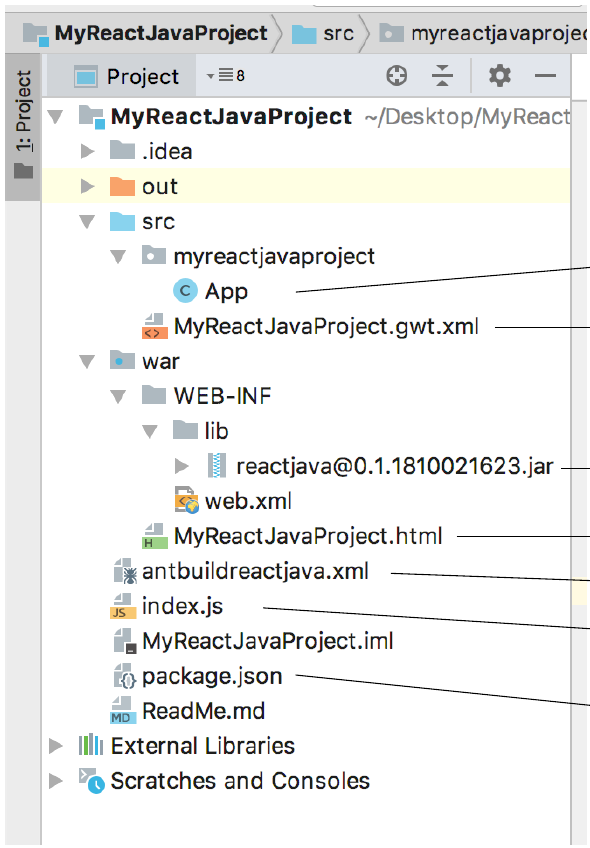
application source file
GWT module descriptor
ReactJava libraries
application html file ant build file application launch file
application package descriptor
Example in Ten Steps: ThreeByThree
Here's a simple example that we can build upon in ten steps, learning the main concepts of ReactJava along the way. This example is what is known as a Single Page App (SPA).
The First Step
First we create an app that simply renders a blue block. You can get the source here, and you can try it here.
import io.reactjava.client.core.react.AppComponentTemplate;

public class MyApp extends AppComponentTemplate
{
   public final void render()
   {
      /*--
      <div style='background:blue;height:300px;width:300px;'></div>
      --*/
   }
}
That's all there is to it: ReactJava apps can be extremely simple.
Every ReactJava application starts with a custom app class that extends AppComponentTemplate. AppComponentTemplate is a subclass of the Component class, the central class of ReactJava. Some apps are made up entirely of a single custom app class, as is the case for this first example.
The most important method of the Component class is the render() method. The default implementation of the Component render method() is empty - it doesn't include anything at all. The overriding render() method of our MyApp class includes a single line of markup in JSX which causes a blue block 540 pixels on a side to be rendered on the screen.
As you can see, JSX looks a lot like HTML, and serves as the main means by which a Component expresses the appearance it should take on the screen. A Component render() method can contain any combination of Java code and JSX. The JSX is separated from any Java
code by a special version of the standard block comment delimiters; the character sequence '/ *--' begins a block of JSX and the character sequence '--*/' terminates it.
Note that a render() method must have no more than one root component in its markup. The root may have any number of descendant components, but if there is more than one root component, only the first will be rendered. In the example below, only the blue square will be shown; the green square will not.
import io.reactjava.client.core.react.AppComponentTemplate;

public class MyApp extends AppComponentTemplate
{
   public final void render()
   {
      /*--
      <div style='background:blue;height:300px;width:300px;'></div>
      <div style='background:green;height:300px;width:300px;'></div>
      --*/
   }
}
In order to render both squares, they should be wrapped within a single root container element.
import io.reactjava.client.core.react.AppComponentTemplate;

public class MyApp extends AppComponentTemplate
{
   public final void render()
   {
      /*--
      <div>
         <div style='background:blue;height:300px;width:300px;'></div>
         <div style='background:green;height:300px;width:300px;'></div>
      </div>
      --*/
   }
}
Adding CSS
Instead of styling our block inline, it's usually preferable to express styling in CSS. The Component class provides a method for this called renderCSS(). It uses the same special block comment delimiters as in the render() method, but this time they separate Java code from CSS statements instead of JSX. You can select CSS styles selected to all elements that share a class specification, or styles to be applied to a specific element selected by its id.
CSS Selector for Class
Here's our first example using CSS instead of inline styling. The CSS declaration for class 'square' explicitly assigns the height and the width of the cell, making the cell square. You can get the source here, and you can try it here.
public final void render()
{
   /*--
   <div class='square'></div>
   --*/
};

public void renderCSS()
{
   /*--
   .square
   {
      background: green;
      width:      300px;
      height:     300px;
   }
   --*/
}
CSS Selector for Element Id
In this next example, we declare the CSS style for the specific element instance. It uses the cssSelectorForId() method of the Component class. This is a very useful pattern if you want to control more than one instance of the same Component class differently from the others. You can get the source here, and you can try it here.
public final void render()
{
   /*--
   <div></div>
   --*/
};

public void renderCSS()
{
   /*--
   {cssSelectorForId()}
   {
      background: blue;
      width:      300px;
      height:     300px;
   }
   --*/
}
Mixing CSS Selector Types
In this last example, we include a mix of selector types in our CSS. We select by the class 'square' for specifying the size, and we select by the elementId for the square's color. That way, all squares will be the same size, but each square instance can have its color specified independently from the others. You can get the source here, and you can try it here.
public final void render()
{
   /*--
   <div class='square'></div>
   --*/
};

public void renderCSS()
{
   /*--
   .square              {width:300px; height:300px;}
   {cssSelectorForId()} {background-color:blue;}
  --*/
}
Centering the Square on the Screen
Rather than always sticking to the leading edge of the screen, let's keep our square in the center, regardless of how the width of the browser window changes. We can accomplish that by putting the square in a 'row' element that extends across the entire width of the screen, and then using CSS to center our square within the row. You can get the source here, and you can try it here.
public final void render()
{
   /*--
   <div class='row'>
      <div class='square'></div>
   </div>
   --*/
};

public void renderCSS()
{
   /*--
   .row
   {
      display:          flex;
      flex:             one;
      flex-direction:   row;
      width:            100%;
      align-items:      center;
      justify-content:  center;
   }
   .square
   {
      width:            300px;
      height:           300px;
      background-color: blue;
   }
   --*/
}
Centering the Square within a Column
Here's another way to center our square within the row. It offers the advantage of a bit more generality at the expense of being slightly more complex. We add a 'column' element to the row to hold the square and declare its CSS so that the square's computed height will always equal its width. Check out the 'box-sizing: border-box;' and the 'padding-top: 100%' specifications to see how this works. Now we can always maintain a square shape for a specified width without having to also specify the height. You can get the source here, and you can try it here.
public final void render()
{
   /*--
   <div class='row'>
      <div class='contentWidth'>
         <div class='square'></div>
      </div>
   </div>
   --*/
}

public void renderCSS()
{
   /*--
   .row
   {
      display:          flex;
      flex:             one;
      flex-direction:   row;
      width:            100%;
      align-items:      center;
      justify-content:  center;
   }
   .contentWidth
   {
      box-sizing:       border-box;
      width:            300px;
   }
   .square
   {
     padding-top:       100%;
     background-color:  blue;
   }
   --*/
}
Centering the Square with Material-UI Grid
Rather than going to the trouble of writing complicated CSS ourselves, it's often easier to leverage existing React components from leading third-party libraries. Material-UI is currently the leading React component library, and it includes a Grid component that is specifically designed to create a grid structure on the screen that we can use to center our square. (We'll be able to use it for other useful things later as well). You can reference the parameters of the Grid API here.
The Material-UI library is included in the project by default. If it hadn't been, you could have gone to the terminal tab in IntelliJ and installed it with npm:
> npm i @material-ui/coreWe've applied it below. Notice how we name the Material-UI Grid component and applied its parameters. The Grid container and item elements play the roles of the 'row' and 'column' elements of the previous example. You can get the source here, and you can try it here.
public final void render()
{
   /*--
   <@material-ui.core.Grid container justify="center">
      <@material-ui.core.Grid item class='contentWidth'>
         <div class='square'></div>
      </@material-ui.core.Grid>
   </@material-ui.core.Grid>
  --*/
}

public void renderCSS()
{
   /*--
   .contentWidth
   {
     width:            300px;
   }
   .square
   {
     padding-top:      100%;
     background-color: blue;
   }
  --*/
}
Making the App Responsive
Instead of sizing the square the same regardless of the size of the window, it is often better to automatically resize it to keep the block approximately scaled to the size of the window. That way, what look good on a large desktop monitor will also look good on a small handheld device. And it isn't just the size of a single item we want to scale: we want to automatically adjust the whole layout so it works well for different screen sizes.
This is called 'responsive design', and we do it in steps called 'breakpoints' that we implement in our CSS with media queries. We've applied five breakpoints below. Notice how the size of the square changes as you drag the browser window to different sizes. You can get the source here, and you can try it here.
public void renderCSS()
{
   /*--
   .square
   {
     padding-top:      100%;
     background-color: blue;
   }
  .contentWidth
   {
   }
   @media(min-width: 320px)
   {
      .contentWidth {width: 300px;}
   }
   @media(min-width: 576px)
   {
      .contentWidth {width: 540px;}
   }
   @media(min-width: 768px)
   {
      .contentWidth {width: 720px;}
   }
   @media(min-width: 992px)
   {
      .contentWidth {width: 960px;}
   }
   @media(min-width: 1200px)
   {
      .contentWidth {width: 1140px;}
   }
   --*/
};
Add Consistency by Using a Theme
A theme is a set of constants related to various styling parameters. By relying upon the current theme, a Component can ensure consistency across an entire application.
Media query breakpoints are properties of the theme, and by using the theme breakpoint values, you can ensure consistency and at the same time make the CSS easier to maintain.
In the example below, we've replaced the declaration of explicit breakpoint values with symbolic ones accessed from the current theme. We've also mixed in Java code with the CSS. And also notice how we've replaced explicit CSS values with references to Java values by enclosing the Java references with curly braces, '{' and '}'. You can get the source here, and you can try it here.
import io.reactjava.client.core.react.IUITheme;
import io.reactjava.client.core.react.IUITheme.Breakpoints;
...
public void renderCSS()
{
   Breakpoints bkpts = getTheme().getBreakpoints();
   String      sm    = IUITheme.toPx(bkpts.getSizeSmall());
   String      md    = IUITheme.toPx(bkpts.getSizeMedium());
   String      lg    = IUITheme.toPx(bkpts.getSizeLarge());
   String      xl    = IUITheme.toPx(bkpts.getSizeExtraLarge());
   String      xsDim = IUITheme.cssLengthScale(sm, 0.5);
   String      smDim = IUITheme.cssLengthScale(sm, 0.8);
   String      mdDim = IUITheme.cssLengthScale(md, 0.8);
   String      lgDim = IUITheme.cssLengthScale(lg, 0.8);
   String      xlDim = IUITheme.cssLengthScale(xl, 0.8);
/*--
   .square              {padding-top:      100%;}
   {cssSelectorForId()} {background-color: blue;}
   .contentWidth
   {
   }
   @media(max-width: {sm})
   {
      .content {width:{xsDim};}
   }
   @media(min-width: {sm})
   {
      .content {width:{smDim};}
   }
   @media(min-width: {md})
   {
      .content {width:{mdDim};}
   }
   @media(min-width: {lg})
   {
      .content {width:{lgDim};}
   }
   @media(min-width: {xl})
   {
      .content {width:{xlDim};
   }
--*/
}
Add Interaction with a Click Handler
We can add a click handler to our square to change its color. We've also mixed Java code in with the JSX, and like the previous example, we've replaced explicit JSX values with references to Java values by enclosing the Java references with curly braces, '{' and '}'. Note that the elemental2 library comes built-in with ReactJava.
You can get the source here, and you can try it here.
import elemental2.dom.Element;
import elemental2.dom.Event;
import io.reactjava.client.core.react.INativeEventHandler;

...

public INativeEventHandler squareClickHandler = (Event e) ->
{
                                      // change the clicked element to green //
   Element element = (Element)e.target;
   element.setAttribute("style", "background-color:green");
};

public final void render()
{
   /*--
   <@material-ui.core.Grid container justify="center">
      <@material-ui.core.Grid item class='contentWidth'>
         <div class='square' onClick={squareClickHandler}></div>
      </@material-ui.core.Grid>
   </@material-ui.core.Grid>
  --*/
};
Add Nine Squares to a Board
Rather than a single square, we can add nine squares to an outer Grid container 'board' element, making the layout look like tic-tac-toe. Notice how we can intersperse Java with JSX.
The outer 'board' Grid container is just like the previous examples, but this time it centers three Grid container 'row' elements instead of one column element. Each row contains three Grid item 'column' elements horizontally, and each 'column' element contains a square just like before. Each square shares the common click handler.
The Grid item column element parameter 'xs={4}' indirectly specifies the column width so it isn't specified explicitly in the CSS.
You can get the source here, and you can try it here.
public final void render()
{
/*--
   <@material-ui.core.Grid container justify="center">
--*/
   for (int iRow = 0; iRow < 3; iRow++)
   {
/*--
      <@material-ui.core.Grid container spacing={8} class='contentWidth' >
--*/
      for (int iCol = 0; iCol < 3; iCol++)
      {
/*--
         <@material-ui.core.Grid item xs={4}>
            <div class='square' onClick={squareClickHandler}></div>
         </@material-ui.core.Grid>
--*/
      }
/*--
      </@material-ui.core.Grid>
--*/
   }
/*--
  </@material-ui.core.Grid>
--*/
};

public void renderCSS()
{
   ...
   .contentWidth
   {
      margin-top: 4px;
   }
   ...
--*/
};
Getting a Color from the Cloud
In order to show how you can access the web from your app, let's assume when the user clicks a square, rather than supplying a new color for it to take explicitly, you'd rather get the new color from a backend server in the cloud. How could you do that?
ReactJava provides a Service Provider called 'HttpClient' which supports you making Http requests. One variation of its API leverages ReactiveX to handle asynchronous completion. The ReactiveX library comes built-in with ReactJava. You can learn more about ReactiveX and how it compares with other asynchronous support mechanisms.
You can get the source here for this example, and you can try it here.
...
import elemental2.dom.DomGlobal;
import io.reactjava.client.core.providers.http.HttpClient;
import io.reactjava.client.core.providers.http.HttpResponse;
...

public INativeEventHandler squareClickHandler = (Event e) ->
{
   final Element element = (Element)e.target;

                                       // request a color from the backend    //
   HttpClient.get(
      "http://reactjavabackend.appspot.com/examples/threebythree/getColor")
      .subscribe(
         (HttpResponse rsp) ->
         {
                                       // change the clicked element to green //
           element.setAttribute("style", "background-color:" + rsp.getText());
         },
         (Throwable error) ->
         {
            DomGlobal.window.console.log(error.getMessage());
         });
};
Components, Properties, and State
Let's extend our example to cover some additional core concepts; namely, writing custom components, configuring them with properties, and responding to changes to their state.
Custom Components and Properties
So far our entire app has been constructed with a single class. For the sake of clarity and maintainability, let's split that up into three classes: one for a Square, another for a Board, and the third we'll use what remains of our original App. All three are components.
Let's start with the new version of the App which simply renders the Board and provides the shared clickHandler. Notice we refer to the Board component by means of a tag with its simple classname. Notice also that we configure the Board by assigning two different properties: 'numColumns' specifies the number of rows and columns the Board should contain, and 'clickHandler' specifies the shared click handler.
Component properties are specified in this way, from the parent down. Their names are lower case. By convention, they are also immutable, that is, they are read-only; the child should never modify its configured set of properties. You can get the source here.
import io.reactjava.client.core.react.AppComponentTemplate;
public class MyApp extends AppComponentTemplate
{
   public INativeEventHandler squareClickHandler = (Event e) ->
   {
      final Element element = (Element)e.target;
                                       // request a color from the backend    //
      HttpClient.get(
         "http://reactjavabackend.appspot.com/examples/threebythree/getColor")
         .subscribe(
            (HttpResponse rsp) ->
            {
                                       // change the clicked element to green //
               element.setAttribute("style","background-color:"+rsp.getText());
            },
            (Throwable error) ->
            {
               DomGlobal.window.console.log(error.getMessage());
            });
   };
   public final void render()
   {
      /*--
      <Board numcolumns={4} clickhandler={squareClickHandler}></Board>
      --*/
   };
}
Now the Board. It gets the number of rows and columns it should create by the value of its 'numColumns' property which is normalized to the closest integral fit to the twelve column layout of the Material-UI Grid. It also passes the click handler it gets to each of the Squares it creates. Like before, we refer to the Square component by means of a tag with its simple classname. You can get the source here.
import io.reactjava.client.core.react.Component;

public class Board extends Component
{
   public final void render()
   {
      int numColumns;
      int gridColsEach;

      // normalize the closest integral fit to the twelve column grid layout

      numColumns   = props().getInt('numColumns');
      gridColsEach = 12 / numColumns;
      numColumns   = 12 / gridColsEach;
                                                                          /*--
      <@material-ui.core.Grid container justify="center">
                                                                          --*/
      for (int iRow = 0; iRow < numColumns; iRow++)
      {
                                                                          /*--
         <@material-ui.core.Grid container spacing={8} class='contentWidth'>
                                                                          --*/
         for (int iCol = 0; iCol < numColumns>; iCol++)
         {
                                                                          /*--
            <@material-ui.core.Grid item xs={gridColsEach}>
               <Square clickhandler={props().get("clickhandler")}></Square>
            </@material-ui.core.Grid>
                                                                          --*/
         }
                                                                          /*--
         </@material-ui.core.Grid>
                                                                          --*/
      }
                                                                          /*--
      </@material-ui.core.Grid>
                                                                          --*/
   };

   ...
}
The Board component CSS is the same responsive code we used before.
import io.reactjava.client.core.react.IUITheme;
import io.reactjava.client.core.react.IUITheme.Breakpoints;
...
public void renderCSS()
{
   Breakpoints bkpts = getTheme().getBreakpoints();
   String      sm    = IUITheme.toPx(bkpts.getSizeSmall());
   String      md    = IUITheme.toPx(bkpts.getSizeMedium());
   String      lg    = IUITheme.toPx(bkpts.getSizeLarge());
   String      xl    = IUITheme.toPx(bkpts.getSizeExtraLarge());
   String      xsDim = IUITheme.cssLengthScale(sm, 0.5);
   String      smDim = IUITheme.cssLengthScale(sm, 0.8);
   String      mdDim = IUITheme.cssLengthScale(md, 0.8);
   String      lgDim = IUITheme.cssLengthScale(lg, 0.8);
   String      xlDim = IUITheme.cssLengthScale(xl, 0.8);
/*--
  .contentWidth
   {
   }
   @media(max-width: {sm})
   {
      .content {width:{xsDim};}
   }
   @media(min-width: {sm})
   {
      .content {width:{smDim};}
   }
   @media(min-width: {md})
   {
      .content {width:{mdDim};}
   }
   @media(min-width: {lg})
   {
      .content {width:{lgDim};}
   }
   @media(min-width: {xl})
   {
      .content {width:{xlDim};
   }
--*/
};
Finally, the Square. It is essentially the same as it was originally, although this time it takes its click handler from its properties. You can get the source here, and you can try the completed App here.
import io.reactjava.client.core.react.Component;

public class Square extends Component
{
   public final void render()
   {
   /*--
      <div class='square' onClick={props().get("clickHandler")}></div>
   --*/
   };

   public void renderCSS()
   {
      /*--
      .square
      {
        padding-top:       100%;
      }
      {cssSelectorForId()}
      {
         background-color: blue;
      }
      --*/
   };
}
Notes on the render() Method
Note the following with respect to the render() method:
1. An empty render() method will automatically generate a simple 'div' component.
Also, there are a few restrictions on the render() method of custom components:
1. Any custom component which is the target of a route path must have a render() method, even if it is empty.
2. All component render() methods must be final. As a consequence, the render() method of any component class may not invoke the render() method of any superclass.
Specifying App Properties
Properties for the App component can be specified in a few ways: programatically by assignment in an override of either the non-default constructor or the App initialize() method, or at execute time by specification of url parameters.
Specifying App Properties Programatically
Properties for the App component can be specified in an override of the non-default constructor as follows:
...

public App(Properties props)
{
   super(Properties.with(props, "myPropertyName", myPropertyValue));
};
or in an override of the App initialize() method:
...

initialize()
{
   props().set("myPropertyName", myPropertyValue);
};
Specifying App Properties with URL Parameters
Properties for the App component can be specified at execute time by means of URL query parameters. For example, the URL
http://myAppURL?myProperty1Name=myProperty1Value&myProperty2Name=myProperty2Valuespecifies two App properties, each with a string value.
Specifying App Log Level with a URL Parameter
The App log level can be specified at launch time by means of a URL parameter with the well known name '$LOG_LEVEL'. For example, the URL
http://myAppURL?$LOG_LEVEL=DEBUGlaunches the App with the DEBUG log level.
Providing a Default ElementId
A component can provide a default elementId value to be used in the event one is not provided with its declaration. This is accomplished by overriding the Component defaultElementId() method:
...

defaultElementId()
{
   return("myDefaultElementIdValue");
};
Managing Component State
You can't change a component's properties, but you can change a component's state variables. And when you do, if the state variable changes value, your component will re-render. To illustrate, let's use a state change to modify the color of a square when it's clicked instead of the way we did it before.
We declare a state variable called "color" in the Square class and initialize its value to "blue" and make our CSS use whatever is the current value of the state variable. The useState() method is a React Hook which implicitly declares a state variable by name and initializes its value. Any useState() invocation must be located before any other kind of statement in the render() method and it is implemented such that it is ignored other than the very first time it is invoked. You can get the source here.
import io.reactjava.client.core.react.Component;

public class SquareByRender extends Component
{
   public final void render()
   {
      useState("color", "blue");
                                     // use Paper instead of div to allow   //
                                     // non-string parameter 'clickhandler" //
                                     // to be passed as a property by parent//
                                     // which can't be done for div         //
   /*--
      <@material-ui.core.Paper
         class='square' onClick={props().get("clickHandler")}
      />
   --*/
   };

   public void renderCSS()
   {
      /*--
      .square
      {
        padding-top:       100%;
      }
      {cssSelectorForId()}
      {
         background-color: {getStateString("color)};
      }
      --*/
   };
}
We can accomplish the same thing another way, by doing the styling inline. You can get the source here.
public final void render()
{
   useState("color", "blue");
   String color = getStateString("color");

                                     // use Paper instead of div to allow   //
                                     // non-string parameter 'clickhandler" //
                                     // to be passed as a property by parent//
                                     // which can't be done for div         //
/*--
   <@material-ui.core.Paper
      style'backgroundColor:{color};paddingTop:100%'
      onClick={props().get("clickHandler")}
   >
   </div>
--*/
};
If we want the flexibility to handle it either way as a configuration property, we can modify the Board markup to choose which class to use for the Square as a function of a Board property 'squareclass'. You can get the source here.
...
for (int iCol = 0; iCol < numColumns; iCol++)
{
                                                                     /*--
   <@material-ui.core.Grid item xs={gridColsEach}>
                                                                     --*/
   if ("SquareByRenderCSS".equals(props().getString("squareclass")))
   {
                                                                     /*--
      <SquareByRenderCSS clickhandler={props().get("clickhandler")} />
                                                                     --*/
   }
   else
   {
                                                                     /*--
      <SquareByRender clickhandler={props().get("clickhandler")} />
                                                                     --*/
   }
                                                                     /*--
   </@material-ui.core.Grid>
                                                                     --*/
}
...
The Board'squareclass' property is assigned by the App as shown below. You can get the source here, and try the app here.
...

public final void render()
{
/*--
   <Board
      numcolumns={3}
      clickhandler={squareClickHandler}
      squareclass={"SquareByRenderCSS"}
   />
--*/
}
Querying whether a Component is Mounted
ReactJava provides a built-in effectHook handler which tracks whether a Component is mounted or dismounted. You can check whether a Component is mounted by means of the getMounted() method.
Finding a Component Instance
There are times it is necessary to programatically interact with a specific Component instance. Typically, this is the case when the target Component provides an API that includes non-static methods, and the instance of interest cannot be supplied in the consumer props.
ReactJava provides three ways to find a specific Component instance: by the target Component class, by the target Component Id, and by any Element created by the target Component render() method.
Component.forClass()
The forClass() static method provides a Component instance for a specified class. Since the Component instance may not have yet been created at the time of invocation, the method returns an Observable that is resolved either immediately, or upon subsequent instantiation. For example,
...

Component.forClass(PDFViewer.class).subscribe(
   (Component instance) ->
   {
      buildTableOfContents((PDFViewer)instance).getBookmarks());
   },
   error ->
   {
      errorHandler(error);
   });
Component.forId()
The forId() static method provides a Component instance for a specified Component Id. A Component Id can be declared by the target Component's override of the defaultId() method, or by specifying an "id" parameter in the corresponding tag within a render() method. The method returns an Observable that is resolved either immediately, or upon subsequent instantiation. For example,
import io.reactjava.client.components.pdfviewer.PDFViewer;
...

public class MyComponent extends Component
{
   public final void render()
   {
      NativeObject pdfOptions =
         NativeObject.with("pdfurl", "http://reactjava.io/docs/ReactJava.pdf");
 /*--
      <PDFViewer id="myPDFViewer" pdfoptions={pdfOptions} />
  --*/
   };

...

Component.forId("myPDFViewer").subscribe(
   (Component instance) ->
   {
      buildTableOfContents((PDFViewer)instance).getBookmarks());
   },
   error ->
   {
      errorHandler(error);
   });
The default Component Id of the App instance is its classname.
Component.forElement()
The forElement() static method provides the Component instance for any Element that it created in its render() method. The method returns the Component instance directly. For example,
import elemental2.dom.DomGlobal;
import elemental2.dom.Element;
...

public class MyComponent extends Component
{
   public final void render()
   {
/*--
      <div>
         <p id="myParagraph"> This is the content of my paragraph </p>
      </div>
  --*/
   };

...

Element paragraph = DomGlobal.document.getElementById("myParagraph");
if (paragraph != null)
{
   MyComponent myComponentInstance = (MyComponent)Component.forElement(paragraph);
}
Finding the App instance
The default Component Id of the App instance is its classname for which you can get the App instance by using Component.forId() as follows:
Component.forId(App.class.getName()).subscribe(
   (App app) ->
   {
      ...
   },
   error ->
   {
      errorHandler(error);
   });
or you can simply use the Configuration static method:
App app = Configuration.sharedInstance().getApp();or even simpler, the App static convenience method:
App app = App.sharedInstance();React Hooks
Hooks are a relatively new addition to React which allow the use of state and other React features without the requirement to explicitly declare associated class variables.
useState()
The useState() method described previously is one of the React Hooks which allows management of component state without an explicit 'state' component member variable.
useEffect()
The useEffect() method declares a callback to be invoked when after component is mounted, before it is unmounted, aftre it is updated, and whenever any of a specified set of property and state values change. Invoking the useEffect() method tells React that your component needs to do something after render. React will remember the function you passed (we’ll refer to it as our “effect”), and call it later after performing the DOM updates.
There are two useEffect() methods: one with the callback as the sole argument, and another which adds an array of property and state names as a second argument.
If the single argument method is used, the callback will be invoked after the component is mounted, before it is unmounted and anytime it is updated.
If the two argument method is used, the callback will be invoked after the component is mounted, before it is unmounted and anytime any of the specified property or state values are changed.
If the two argument method is used, and the specified conditions array is empty, the callback will be invoked only after the component is mounted and before it is unmounted.
For example,
...

public INativeEffectHandler handleEffect = () ->
{
   // do something at component mount time, unmount time,
   // and any update
};

...

public final void render()
{
                        // handler invoked after mounted,      //
                        // before unmounted, and any update    //

   useEffect(handleEffect);
}
and,
...

public INativeEffectHandler handleEffect = () ->
{
   // do something at component mount time and unmount time
};

...

public final void render()
{
                        // passing an empty set of dependencies//
                        // causes the effect handler to be     //
                        // invoked only after mounted and      //
                        // before unmounted, not on update as  //
                        // would occurr if used the single     //
                        // argument useEffect() method         //

   useEffect(handleEffect, new Object[0]);
}
If you do not need your callback to be invoked before the component is unmounted, you can return a null cleanup function from your callback:
...

public INativeEffectHandler handleEffect = () ->
{
   // do something at component mount time only

   ...
   return(INativeEffectHandler.kNO_CLEANUP_FCN)
};
Otherwise, your callback will be invoked before the component is unmounted and will be handled in the cleanup fuynction you return:
...
public INativeEffectHandler handleEffect = () ->
{
   // do something at component mount time

   ...

   return(() ->
   {
      System.out.println("component will unmount");
   });
};
useRef()
The useRef() method is supported for research purposes only, since its functionality can be readily replaced in ReactJava by use of a declared component instance variable.
Use Components from a React Library
We can change the standard button to be one from a third-party React component library.
Material-UI Example
We've already used components from Google's Material Design which comes built-in with ReactJava. To use a button from Material-UI rather than the default HTML component, the only change is to the markup in the render() method. The original,
/*--
         <Button
            class='button'
            onClick={this.buttonClickHandler}>
            Change Colors
         </Button>
--*/
is changed to
/*--
         <@material-ui.core.Button
            class='button'
            variant='contained'
            fullWidth=true
            onClick={this.buttonClickHandler}>
            Change Colors
         </@material-ui.core.Button>
--*/
The only change is to the markup in the render() method. Note the reference made to the Material-UI button component, '@material-ui.core.Button' whose name derives directly from its relative path in the project node_modules directory. The extra properties, 'variant' and 'fullWidth' are custom to the @material-ui.core.Button class, adding extra functionality that you can find out about in the Material-UI reference documentation.
Grommet Example
As another example, let's use Grommet.
Start by using npm to load the Grommet library. Open a terminal, and change the working directory to the IntelliJ project folder (or just open the terminal tab in the project):
> cd [pathToYourReactJavaProjectFolder]Then use npm to load the Grommet library:
> npm install grommet grommet-icons styled-componentsLike the previous example, the only change is to the markup in the render() method. Note the reference made to the Grommet button component, 'grommet.components.Button whose name derives directly from its relative path in the project node_modules directory.
The original
/*--
         <@material-ui.core.Button
            class='button'
            variant='contained'
            fullWidth=true
            onClick={this.buttonClickHandler}>
            Change Colors
         </@material-ui.core.Button>
--*/
changed to
/*--
         <grommet.components.Button
            class='button'
            onClick={this.buttonClickHandler}>
            Change Colors
         </grommet.components.Button>
--*/
Unlike when using components from Material-UI, since Grommet is not built-in to ReactJava, we must declare Grommet as an imported node module by overriding the getImportedNodeModules() method:
/*------------------------------------------------------------------------------

@name       getImportedNodeModules - get imported node modules
                                                                              */
                                                                             /**
            Get imported node modules.

@return     list of node module names.

@history    Sat Aug 29, 2020 10:30:00 (Giavaneers - LBM) created

@notes
                                                                              */
//------------------------------------------------------------------------------
@Override
protected StringLiteralList getImportedNodeModules()
{
   return(StringLiteralList.newInstance("grommet.components.Button"));
}
See the section on Adding Additional Node Modules for more information.
Recharts Example
One of today's leading chart packages for use with React is Recharts.
You can add Recharts to your project using npm,
> npm install rechartsTo create a simple Line Chart, add an override for getImportedNodeModules() to create easy to read tag aliases,
  @Override
  protected StringLiteralList getImportedNodeModules()
  {
     return(StringLiteralList.newInstance(
        "recharts.cartesian.CartesianGrid as CartesianGrid",
        "recharts.cartesian.Line          as Line",
        "recharts.cartesian.XAxis         as XAxis",
        "recharts.cartesian.YAxis         as YAxis",
        "recharts.chart.LineChart         as LineChart",
        "recharts.component.Tooltip       as Tooltip",
        "recharts.component.Legend        as Legend"));
  }
define data and a margin specification,
  public static final NativeObject[] kDATA =
  {
     NativeObject.with("name", "Page A", "uv", 4000, "pv", 2400, "amt", 2400),
     NativeObject.with("name", "Page B", "uv", 3000, "pv", 1398, "amt", 2210),
     NativeObject.with("name", "Page C", "uv", 2000, "pv", 9800, "amt", 2290),
     NativeObject.with("name", "Page D", "uv", 2780 ,"pv", 3908, "amt", 2000),
     NativeObject.with("name", "Page E", "uv", 1890, "pv", 4800, "amt", 2181),
     NativeObject.with("name", "Page F", "uv", 2390, "pv", 3800, "amt", 2500),
     NativeObject.with("name", "Page G", "uv", 3490, "pv", 4300, "amt", 2100)
  };

  public static final NativeObject kMARGIN =
     NativeObject.with("top", 5, "right", 30, "left", 20, "bottom", 5);
and then implement the render() method,
  public final void render()
  {
  /*--
     <LineChart width={500} height={300} data={kDATA} margin={kMARGIN}>
        <CartesianGrid strokeDasharray="3 3" />
        <XAxis dataKey="name" />
        <YAxis />
        <Tooltip />
        <Legend />
        <Line type="monotone" dataKey="pv" stroke="#8884d8" />
        <Line type="monotone" dataKey="uv" stroke="#82ca9d" />
     </LineChart>
  --*/
  };
Adding Additional Resources
If your application requires use of additional resources, such as other node modules, javascripts, images, or other files, you can declare so by overriding methods of the INativeWrapper interface.
Native Wrappers
A Native Wrapper is any Object that implements the INativeWrapper interface. Components, and therefore Apps are Native Wrappers, but you can also create your own custom Objects that are Native Wrappers as well. For example, Regression is a Native Wrapper that provides Java access to the regression.js without being a ReactJava Component.
There are three methods of the INativeWrapper interface: getImportedResources(), getImportedJavascripts(), and getImportedNodeModules(). The getImportedResources() method is the general form, while the other two are specific subsets provided for readability and ease of use. The INativeWrapper implementation provides a null return value for all three by default, so you don't have to provide override implementations if you don't have a need to.
Note that the methods of the INativeWrapper interface are typically invoked at compile time.
The following sections describe how to use methods of the INativeWrapper interface to add a variety of additional resources to a ReactJava App.
  import io.reactjava.client.core.react.StringLiteralList
  ...

  @Override
  public StringLiteralList getImportedNodeModules()
  {
     return(StringLiteralList.newInstance(
        "recharts.cartesian.CartesianGrid as CartesianGrid",
        "recharts.cartesian.Line          as Line",
        "recharts.cartesian.XAxis         as XAxis",
        "recharts.cartesian.YAxis         as YAxis",
        "recharts.chart.LineChart         as LineChart",
        "recharts.component.Tooltip       as Tooltip",
        "recharts.component.Legend        as Legend"));
  }
Adding Additional Node Modules
If your application requires use of additional node modules, you can declare so by overriding the getImportedNodeModules() method of the INativeWrapper interface in your component as shown in the following snippet:
/*==============================================================================

name:       App.java

purpose:    Three By Three App.

history:    Sat Oct 27, 2018 10:30:00 (Giavaneers - LBM) created

notes:

                    COPYRIGHT (c) BY GIAVANEERS, INC.
      This source code is licensed under the MIT license found in the
            LICENSE file in the root directory of this source tree.

==============================================================================*/

import io.reactjava.client.core.react.StringLiteralList
...

/*------------------------------------------------------------------------------

@name       getImportedNodeModules - get imported node modules
                                                                              */
                                                                             /**
            Get imported node modules. This implementation declares the
            'assert' node module should be imported.

@return     String literal list of node module names separated by commas

@history    Sun Dec 02, 2018 10:30:00 (Giavaneers - LBM) created

@notes
                                                                              */
//------------------------------------------------------------------------------
@Override
protected StringLiteralList getImportedNodeModules()
{
   return(StringLiteralList.newInstance("assert"));
}
The value returned by the App is a StringLiteralList containing an ordered list of String literal node module names separated by commas of the folowing form:
"nodeModuleName1[:javascript:css], nodeModuleName2[:javascript:css],..."
where,
nodeModuleName is the String literal name of the node module in the project node_modules directory,
:javascript is an optional qualifier indicating the 'main' module javascript is to be imported
:css is an optional qualifier indicating the 'style' module css is to be imported
If either ':css' or ':javascript' is included but the other is not, the other is not imported.
If neither ':css' nor ':javascript' is included, the 'main' module javascript is to be imported (the default case).
If the nodeModuleName ends with '.js', the corresponding specific module script is imported, while if the nodeModuleName ends with '.css', the corresponding specific module stylesheet is imported.
Note that each node module name must be a String literal or a class field containing a String literal. In future versions of ReactJava, it may be possible to support other String representations.
As examples,
1. "prismjs" specifies the default script for module 'prismjs' without any module css
2. "prismjs:javascript:css" specifies the default script for module 'prismjs' along with the default module css
3. "prismjs.components.prism-core, prismjs.components.prism-clike, prismjs.components.prism-java, prismjs.themes.prism-okaidia.css"
specifies
components.prism-core.js of module 'prismjs', followed by components.prism-clike.js of module 'prismjs', followed by
components.prism-java.js of module 'prismjs'
and
themes.prism-okaidia.css of module 'prismjs'.
Ensuring Clarity of Node Module JSX Tags
If an additional node module containing a native React component is imported, sometimes the corresponding JSX tag name it is not obvious. For example, the default script for the 'react-split- pane' node module is 'index.cjs.js' from which the JSX tag, 'SplitPane' cannot be inferred.
In these cases, the specific tag to be used can be added to the nodeModuleName as in the following example:
/*------------------------------------------------------------------------------

@name       getImportedNodeModules - get imported node modules
                                                                              */
                                                                             /**
            The react-split-pane SplitPanel tag cannot be inferred from the
            component javascript filename, which is 'index.cjs.js', and so
            the corresponding importedNodeModule is declared with the tag name
            included; namely 'react-split-pane as SplitPanel'.

@return     String literal list of node module names separated by commas

@history    Sun Dec 02, 2018 10:30:00 (Giavaneers - LBM) created

@notes
                                                                              */
//------------------------------------------------------------------------------
@Override
protected StringLiteralList getImportedNodeModules()
{
   return(StringLiteralList.newInstance("react-split-pane as SplitPane"));
}
Adding Additional Javascripts
(No longer included...) If your application requires use of additional javascripts beyond those of node modules, you can declare so by overriding the getCustomJavascripts() method of the AppComponentTemplate class in your App or any other Component as shown in the following snippet:
/*==============================================================================

name:       App.java

purpose:    Three By Three App.

history:    Sat Oct 27, 2018 10:30:00 (Giavaneers - LBM) created

notes:

                    COPYRIGHT (c) BY GIAVANEERS, INC.
      This source code is licensed under the MIT license found in the
            LICENSE file in the root directory of this source tree.

==============================================================================*/

import io.reactjava.client.core.react.StringLiteralList
...

/*------------------------------------------------------------------------------

@name       getCustomJavascripts - get custom javascripts
                                                                              */
                                                                             /**
            Get custom javascripts. This method is typically invoked at
            boot time.

@return     ordered list of javascript urls

@history    Sun Dec 02, 2018 10:30:00 (Giavaneers - LBM) created

@notes
                                                                              */
//------------------------------------------------------------------------------
@Override
protected void getCustomJavascripts()
{
                                       // relative url                        //
   return(StringLiteralList("workflownative.js as ReactJava.workflow");
}

...
The 'as' clause is optional; use it if you want to assign a window global variable of the custom javascript to the ReactJava global variable. The example above will assign the 'workflow' global variable of workflownative.js as a property of the ReactJava global variable. This can be useful when assigning native class namespaces, for this example, 'ReactJava.workflow'.
Adding Other Resources
You can add any sort of file as an embedded resource added to your source tree relative to your App home page.
Embedding Shared Resources
You can add any sort of file as an embedded resource added to your source tree relative to your App home page.
Embedding Images and Other Files
Add any file as an embedded resource to the WAR directory in your project tree. You can access it in your client code as shown in the example below:
                                          // get a url relative to the home page //

   String embeddedRsrcURL = GWT.getHostPageBaseURL() + "MyContent.txt";

                                          // read the contents                   //

   Utilities.getURLAsString(embeddedRsrcURL).subscribe(
      contents ->
      {
         kLOGGER.logInfo(contents);
      },
      (Throwable error) ->
      {
         kLOGGER.logError(error);
      });
Embedding Javascripts as Shared Resources
If you are building a module to be exported as a jar that can be inherited by other modules and want to embed custom javascripts your module requires so they do not have to be explicitly dealt with by the client module, you can do so in the same way you embed other exported resources. See the section on embedding shared resources for the way you should add the javascripts to your project source tree and the <public path> specification you need to add to your module gwt.xml file. Then you can name the custom javascripts you are binding by the 'getExportedResourceURL()' method as shown below:
/*==============================================================================

name:       TensorflowAppTemplate.java

purpose:    Tensorflow ReactJava Application Template.

history:    Sat Oct 27, 2018 10:30:00 (Giavaneers - LBM) created

notes:

                    COPYRIGHT (c) BY GIAVANEERS, INC.
      This source code is licensed under the MIT license found in the
            LICENSE file in the root directory of this source tree.

==============================================================================*/

...

public abstract class TensorflowAppTemplate extends AppComponentTemplate...

...

/*------------------------------------------------------------------------------

@name       getCustomJavascripts - get custom javascripts
                                                                              */
                                                                             /**
            Get custom javascript emdedded with the module as a shared, exported
            resource.

@return     ordered list of javascript urls

@history    Sun Dec 02, 2018 10:30:00 (Giavaneers - LBM) created

@notes
                                                                              */
//------------------------------------------------------------------------------
@Override
protected List<String> getCustomJavascripts()
{
  return(Arrays.asList(
     getExportedResourceURL("javascript/tf.1.7.4.js as ReactJava.tf"),
     getExportedResourceURL("javascript/tfjs-vis.1.4.umd.js as ReactJava.tfvis")
  ));
}

...
As mentioned previously, the 'as' clause is optional; use it if you want to assign a window global variable of the embedded javascript to the ReactJava global variable. The example above will assign the 'tf' global variable of 'tf.1.7.4.js' as a property of the ReactJava global variable. This can be useful when assigning native class namespaces, for this example, 'ReactJava.tf'.
Dynamic Routing
Moving from a Single Page Application with a single view to to an app that supports multiple views can be accomplished with Dynamic Routing. Each view is accessed independently by a unique 'route'.
ReactJava determines the routes for a component by invocation of its getNavRoutes() method of the AppComponentTemplate class whose results can change from one invocation to the next. The default implementation of the getNavRoutes() method returns no routes.
A route is a tuple of a particular format of a url that targets the application (a 'path' specification) with an associated component class. The routes declared by a component are organized as a Map, where the key is the path and the value is the associated target component class. For example,
/*------------------------------------------------------------------------------

@name       getNavRoutes - get routes for application
                                                                              */
                                                                             /**
            Get map of component classname by route path.

@history    Sat May 13, 2018 10:30:00 (Giavaneers - LBM) created

@notes
                                                                              */
//------------------------------------------------------------------------------
protected Map<String,Class> getNavRoutes()
{
   Map<String,Class> routeMap = new HashMap<>()
   {{
      put("animals",                    Component1.class);
      put("flowers/:color/:leafcount?", Component2.class);
      put("trees/:height(ten|twenty)",  Component3.class);
   }};

   return(routeMap);
}
returns three different routes.
The first matches explicitly with the relative url value 'animals',
The second matches with the relative url 'flowers', and also assigns the target component 'color' property with the path value element following the 'flowers' value and assigns the 'leafcount' property with the path value element following the 'color' value if it exists. Note the first parameter is required while the second is optional since its path specification includes a trailing question
mark. For example, the relative url '/flowers/yellow/eight' will render the Component2 class, assigning its 'color' property to 'yellow' and its 'leafcount' property to 'eight', while '/flowers/ yellow' will also render the Component2 class, assigning its 'color' property to 'yellow' and leave its 'leafcount' property value unassigned.
The third matches with the relative url 'trees' only if the path value element following the 'trees' value satisfies the regular expression 'ten|twenty', in which case the target component's height property value will be assigned whichever value was specified in the url: either 'ten' or 'twenty'.
In order to change the view, the Router.push() method is invoked specifying the new path. You can get the current path value by using the Router.getPath() method. Note that the Router will cause a re-render for the new path only if the specified path value changes.
A Routing Example
Reviewing an actual example can be helpful. This example consists of three classes. You can get the sources to the 'App' class here, the 'A' class here, and the 'B' class here. You can see the example in operation here.
Notice that the App merely sets up the routes to the two pages, A and B. The implementations of A and B illustrate different ways you can navigate to different locations among the two pages.
Timers
Timers provide the ability to launch an operation to execute in the background either once, or repetitively. A one-shot timer can be created by using the elemental2 DomGlobal.setTimeout() method, and a repeating timer can be created by using the DomGlobal.setInterval() method.
You can get the source to a repeating timer example here, and see the example in operation here.
Keyboard Support
Keyboard support is accomplished by adding a keyEvent listener on the particular element of interest. To create a global keyEvent handler, add the listener on the document body.
You can get the source to an illustrative example here, and see the example in operation here.
Observables and Promises
ReactJava includes built-in support for cleaning up Observables and Promises used by a ReactJava Component once it is dismounted. For Observables, you can take advantage of the built-in support by using the Observable class from the 'io.reactjava.core.react' package, rather than from the 'io.reactjava.core.rxjs' package. For Promises, wrap your Promise in an Observable by using the Observable.fromPromise() factory method.
ReactJava Core Observables
Before being used, access to cloud-based services must be configured by overriding the getCloudServicesConfig() method of the AppComponentTemplate class to provide a configuration object,
/*------------------------------------------------------------------------------

@name       getCloudServicesConfig - get cloud services configuration
                                                                              */
                                                                             /**
            Get cloud services configuration.

@return     cloud services configuration.

@history    Sun Nov 02, 2018 10:30:00 (Giavaneers - LBM) created

@notes
                                                                              */
//------------------------------------------------------------------------------
protected ICloudServices getCloudServicesConfig()
{
   ICloudServices config =
      new CloudServices()
         .setCloudPlatform(ICloudServices.kPLATFORM_FIREBASE)
         .setAPIKey("YOUR_FIREBASE_API_KEY")
         .setProjectId("YOUR_PROJECT_ID")
         .setAppId("1:YOUR_SENDER_ID:web:YOUR_APP_ID")
         .setAuthDomain("YOUR_PROJECT_ID.firebaseapp.com")
         .setDatabaseURL("https://YOUR_PROJECT_ID.firebaseio.com")
         .setMessagingSenderId("YOUR_SENDER_ID")
         .setStorageBucket("YOUR_PROJECT_ID.appspot.com")
         .setTrackingId("YOUR_MEASUREMENT_ID");

   return(config);
}
Wrapping Promises in Observables
Before being used, access to cloud-based services must be configured by overriding the getCloudServicesConfig() method of the AppComponentTemplate class to provide a configuration object,
JSON Support
ReactJava includes a built-in version of the java JSON.simple library cross-compiled to javascript with ReactJava.
Using Cloud Services
ReactJava includes a standard, cross-platform API for a suite of built-in cloud based services, including Analytics, Authentication and User Accounts, Database, File Storage and Messaging.
Configuring Cloud Services
Before being used, access to cloud-based services must be configured by overriding the getCloudServicesConfig() method of the AppComponentTemplate class to provide a configuration object,
/*------------------------------------------------------------------------------

@name       getCloudServicesConfig - get cloud services configuration
                                                                              */
                                                                             /**
            Get cloud services configuration.

@return     cloud services configuration.

@history    Sun Nov 02, 2018 10:30:00 (Giavaneers - LBM) created

@notes
                                                                              */
//------------------------------------------------------------------------------
protected ICloudServices getCloudServicesConfig()
{
   ICloudServices config =
      new CloudServices()
         .setCloudPlatform(ICloudServices.kPLATFORM_FIREBASE)
         .setAPIKey("YOUR_FIREBASE_API_KEY")
         .setProjectId("YOUR_PROJECT_ID")
         .setAppId("1:YOUR_SENDER_ID:web:YOUR_APP_ID")
         .setAuthDomain("YOUR_PROJECT_ID.firebaseapp.com")
         .setDatabaseURL("https://YOUR_PROJECT_ID.firebaseio.com")
         .setMessagingSenderId("YOUR_SENDER_ID")
         .setStorageBucket("YOUR_PROJECT_ID.appspot.com")
         .setTrackingId("YOUR_MEASUREMENT_ID");

   return(config);
}
The default platform is Firebase for which the 'cloudPlatform' assignment may be omitted. The 'APIKey', 'ProjectId' and 'AppId' parameters must always be specified. The other parameters need only be provided if the corresponding services are required.
For example, to configure an App that only uses Authentication and User Account Services of Firebase,
   ICloudServices config =
      new CloudServices()
         .setAPIKey("YOUR_FIREBASE_API_KEY")
         .setProjectId("YOUR_PROJECT_ID")
         .setAppId("1:YOUR_SENDER_ID:web:YOUR_APP_ID")
         .setAuthDomain("YOUR_PROJECT_ID.firebaseapp.com");
or to configure an App that only uses Database Services of Firebase and Google Analytics,
   ICloudServices config =
      new CloudServices()
         .setAPIKey("YOUR_FIREBASE_API_KEY")
         .setProjectId("YOUR_PROJECT_ID")
         .setAppId("1:YOUR_SENDER_ID:web:YOUR_APP_ID")
         .setDatabaseURL("https://YOUR_PROJECT_ID.firebaseio.com")
         .setTrackingId("YOUR_MEASUREMENT_ID");
When using the Firebase platform, you can find the 'APIKey', 'ProjectId' and 'AppId' parameter values from the Firebase Console. Login and select your project and then go to the Project Settings:
In Firebase project settings, select your web app to find its configuration. Use values from your own project in the placeholders above. The historical account-specific console screenshot is omitted.
Among other places, you'll find your parameters in the configuration settings section:
In Firebase project settings, select your web app to find its configuration. Use values from your own project in the placeholders above. The historical account-specific console screenshot is omitted.
Adding Google Analytics
ReactJava has built-in support for adding Google Analytics to your App. The following sections describe different ways you can use it.
Configuring Google Analytics
Rather than the standard Firebase support for Google Analytics, ReactJava leverages the 'react- ga' node module for its functionality which is installed by default.
Before being used, the Google Analytics service must be configured by overriding the getCloudServicesConfig() method of the AppComponentTemplate class,
/*------------------------------------------------------------------------------

@name       getCloudServicesConfig - get cloud services configuration
                                                                              */
                                                                             /**
            Get cloud services configuration. Unlike other configuration
            parameters, if the only cloud service to be used is Google Analytics,
            only the 'trackingId' parameter need be specified.

@return     cloud services configuration.

@history    Sun Nov 02, 2018 10:30:00 (Giavaneers - LBM) created

@notes
                                                                              */
//------------------------------------------------------------------------------
protected ICloudServices getCloudServicesConfig()
{
   return(new CloudServices().setTrackingId("YOUR_MEASUREMENT_ID"));
}
...
Unlike for other configuration parameters, if the only cloud service to be used is Google Analytics, only the 'trackingId' parameter need be specified.
Generating Google Analytics Page Views
If Google Analytics is configured, on render(), a page view event is automatically posted for the specified trackingId without explicit invocation of the API. You can get the source to a simple, illustrative example here.
More General Access to Google Analytics
As described in the previous section, simple access to Google Analytics for reporting application page views is streamlined without need for explicit invocation of the API. The remainder of this section describes how to post additional events, or to access other functionality of the Google Analytics service.
Operation begins by obtaining an Analytics service provider instance:
   import io.reactjava.client.core.providers.analytics.IAnalyticsService;
   import io.reactjava.client.core.react.ReactJava;
   ...

   IAnalyticsService analytics = ReactJava.getProvider(IAnalyticsService.class);
Posting Events
To post an event for the configured trackingIs, you specify an event 'category' along with an event 'action'. For example, to post a ADD_TO_CART event for the configured trackingId,
   import io.reactjava.client.providers.analytics.IAnalyticsService.EventNames;
   ...

   IAnalyticsService analytics = ReactJava.getProvider(IAnalyticsService.class);

   analytics.logEvent(EventNames.ADD_TO_CART.value(), "Added item to cart");
You can get the source to a simple, illustrative example here.
Reading Analytics Data
You will usually use the standard Google Analytics console for analyzing reports about your application. But if you want to present your analytics data in your own custom reports, you can use Google's Core Reporting API, or for realtime reports, Google's Real Time Reporting API.
User Accounts and Authentication
ReactJava has built-in support for a variety of cloud-based Authentication services through a single, standard API. The model of the standard API follows that of Firebase Authentication. You can get the source to an example here, and you can try it here.
Most network services require the client to be authenticated. Once the client is authenticated, ReactJava automatically handles the authentication aspect of service invocations; the client software is not required to provide authentication information for each network service request.
Configuring the Authentication Service
Before being used, the service must be configured by overriding getCloudServicesConfig() method of the AppComponentTemplate class to provide a configuration object,
/*------------------------------------------------------------------------------

@name       getCloudServicesConfig - get cloud services configuration
                                                                              */
                                                                             /**
            Get cloud services configuration.

@return     cloud services configuration.

@history    Sun Nov 02, 2018 10:30:00 (Giavaneers - LBM) created

@notes
                                                                              */
//------------------------------------------------------------------------------
protected ICloudServices getCloudServicesConfig()
{
   ICloudServices config =
      new CloudServices()
         .setAPIKey("YOUR_FIREBASE_API_KEY")
         .setAppId("1:YOUR_SENDER_ID:web:YOUR_APP_ID")
         .setAuthDomain("YOUR_PROJECT_ID.firebaseapp.com")
         .setAppId("1:YOUR_SENDER_ID:web:YOUR_APP_ID")
         .setDatabaseURL("https://YOUR_PROJECT_ID.firebaseio.com")
         .setMessagingSenderId("YOUR_SENDER_ID")
         .setProjectId("YOUR_PROJECT_ID")
         .setStorageBucket("YOUR_PROJECT_ID.appspot.com")
         .setProjectId("YOUR_PROJECT_ID");

   return(config);
}
When Firebase Authentication is used, this information can be obtained from the Firestore Developer Console choosing the target project and then going to the project settings.
Authenticating a User with a Login Dialog
The most common way for a web application to authenticate a user is by the user account email and password. Typically, this is accomplished by means of a Login dialog by which the user email address and password are entered and then used by the web application to establish the user's authentication by means of a service request to the Authentication service.
If the user does not already have an account, it is created first by invocation of the Authentication service after which the user is logged in as usual.
As mentioned earlier, once the client is authenticated, ReactJava automatically handles the authentication aspect of service invocations; the client software is not required to provide authentication information for each network service request.
Accessing the Authentication Service
Operation begins by obtaining an Authentication service provider instance:
   import io.reactjava.client.core.providers.database.IAuthenticationService;
   import io.reactjava.client.core.react.ReactJava;
   ...

   IAuthenticationService auth =
      ReactJava.getProvider(IAuthenticationService.class);
Creating a New User Account
To create a new user account, you simply provide the associated user email address, and a password:
   auth.createUserWithEmailAndPassword(email, password)
      .subscribe(
         (response) ->
         {
            kLOGGER.logInfo("Account created successfully for " + email);
         },
         (error) ->
         {
            kLOGGER.logError("New account creation failed.");
         });
Upon successful account creation, the user is logged in.
Logging In to a User Account
Logging in to a user account requires the user email address and password:
   auth.signInWithEmailAndPassword(email, password)
      .subscribe(
         (response) ->
         {
            kLOGGER.logInfo("Account login successful for " + email);
         },
         (error) ->
         {
            kLOGGER.logError("Account login failed.");
         });
Logging Out of a User Account
Logging out is simple:
   auth.signOut()
      .subscribe(
         (response) ->
         {
            kLOGGER.logInfo("Account logout successful");
         },
         (error) ->
         {
            kLOGGER.logError("Account logout failed.");
         });
Authenticating users safely
Do not embed a user password in a browser application or place it in a downloadable file. A file served from a directory named "private" is not private unless the server enforces access controls. Use an interactive sign-in flow or a server-mediated authentication design appropriate to your application.
Firebase web configuration identifies an application; it is not a substitute for authorization. Apply appropriate Firebase Security Rules and restrict API keys as recommended in the Firebase security checklist.
This replaces the historical configuration-time password example. The original account details and password-distribution instructions are intentionally omitted.
Database Support
ReactJava has built-in support for a variety of cloud-based database services through a single, standard API. The model of the standard API follows that of the Firebase Realtime Database. You can get the source to an example here, and you can try it here.
Built-In Firebase Support
Support for a variety of Firebase services is built-in to ReactJava. Specifically, supporting scripts of the Firebase SDK are injected at execute time as defined in "io.reactjava,client.providers.auth.firebase.FirebaseCore.java".
Configuring the Database Service
Before being used, the service must be configured by overriding getCloudServicesConfig() method of the AppComponentTemplate class to provide a configuration object,
/*------------------------------------------------------------------------------

@name       getCloudServicesConfig - get cloud services configuration
                                                                              */
                                                                             /**
            Get cloud services configuration.

@return     cloud services configuration.

@history    Sun Nov 02, 2018 10:30:00 (Giavaneers - LBM) created

@notes
                                                                              */
//------------------------------------------------------------------------------
protected ICloudServices getCloudServicesConfig()
{
   ICloudServices config =
      new CloudServices()
         .setAPIKey("YOUR_FIREBASE_API_KEY")
         .setProjectId("YOUR_PROJECT_ID")
         .setAppId("1:YOUR_SENDER_ID:web:YOUR_APP_ID")
         .setDatabaseURL("https://YOUR_PROJECT_ID.firebaseio.com");

   return(config);
}
Accessing the Database Service
Operation begins by obtaining a database service provider instance:
   import io.reactjava.client.core.providers.database.IDatabaseService;
   import io.reactjava.client.core.react.ReactJava;
   ...

   IDatabaseService database = ReactJava.getProvider(IDatabaseService.class);
Database Structure
The structure of the database is a tree, similar to that of a filesystem. Each record is identified by its path from the root.
   root
     |
     |- child0
     |    |
     |    |- grandchild00
     |
     |- child1
     |    |
     |    |- grandchild10
     |    |- grandchild11
     |    |    |
     |    |    |- greatgrandchild110
     |    |
     |    |- grandchild12
     |
     |- child2
In the example above there are a total of eight records. The path for greatgrandchild110 is "child1/grandchild11/greatgrandchild110", while the path for child2 is "child2".
Writing to the Database
The value of a database record is modeled as a Map, where the keys are String valued field names and the field values are Objects. To write a record, you specify the parent path along with a record value. For example, to write greatgrandchild110 whose parent is grandchild11,
   Map<String,Object> value = new HashMap<>();
   value.put("message", "This is a message.");

   Observable observable = database.put("child1/grandchild11", value);
      observable.subscribe(
         successfulResponse ->
         {
            // successfully written
            ...
         },
         error ->
         {
            // write unsuccessful
            ...
         });
Deleting Data from the Database
To remove a record and all of its descendants, you use the remove() method specifying the target record path. For example, to remove child0 and all its descendant records,
  Observable observable = database.remove("child0");
      observable.subscribe(
         successfulResponse ->
         {
            // successfully removed
            ...
         },
         error ->
         {
            // remove unsuccessful
            ...
         });
Reading from the Database
There are two ways for reading from the database: reading a specific record once, and registering to receive an notification every time a specified event occurs on the record.
Reading Once
One way to read a record from the database is to use the database 'get()' method, specifying the path of the record of interest:
  Observable observable = database.get("child1/grandchild11/greatgrandchild110");
      observable.subscribe(
         successfulResponse ->
         {
            // successfully read

            Map<String,Object> value = (Map<String,Object>)successfulResponse;
            for (String fieldName : value.keySet())
            {
               kLOGGER.logInfo(fieldName + " -> " + value.get(fieldName));
            }
         },
         error ->
         {
            // read unsuccessful
            ...
         });
Reading Continuously on Changes
The more general way is to use the database 'getStart()' method. The 'getStart()' method takes three arguments: the target record path, an event type, and a callback to which the database record value is delivered. The callback will be called immediately on response to the 'getStart()' method invocation, and then again each time the specified event occurs on the target record.
There are five event types:
1. kEVENT_TYPE_VALUE - this event will trigger once with the initial data stored at this location, and then trigger again each time the data changes.
2. kEVENT_TYPE_CHILD_ADDED - This event will be triggered once for each initial child at this location, and it will be triggered again every time a new child is added.
3. kEVENT_TYPE_CHILD_REMOVED - This event will be triggered once every time a child is removed.
4. kEVENT_TYPE_CHILD_CHANGED - This event will be triggered when the data stored in a child (or any of its descendants) changes. Note that a single child_changed event may represent multiple changes to the child. The value passed to the callback will contain the new child contents. For ordering purposes, the callback is also passed a second argument which is a string containing the key of the previous sibling child by sort order, or null if it is the first child.
5. kEVENT_TYPE_CHILD_MOVED - This event will be triggered when a child's sort order changes such that its position relative to its siblings changes. The value passed to the callback will be for the data of the child that has moved. It is also passed a second argument which is a string containing the key of the previous sibling child by sort order, or null if it is the first child.
For example, to read the current contents of child0 and the be notified as each new child is added,
   IDatabaseService.IEventCallback myCallback =
      database.getStart(
      "child0",
      IDatabaseService.kEVENT_TYPE_CHILD_ADDED,
      (Map<String,Object> value, String prevChildKey) ->
      {
         for (String fieldName : value.keySet())
         {
            kLOGGER.logInfo(fieldName + " -> " + value.get(fieldName));
         }
      });
Stopping Reading on Record Changes
Continuous reading on record changes can be stopped by use of the 'getStop()' method. For example, to stop being notified when a new child is added to child0,
   database.getStop(
      "child0", IDatabaseService.kEVENT_TYPE_CHILD_ADDED, myCallback);
SEO Support
It is sometimes difficult to achieve good Search Engine Optimization results for React singe page applications, especially for those that include multiple page views via multiple routes. ReactJava provides built-in SEO support specifically tailored for single page applications that include one or more views. The figure below illustrates ReactJava auto-generated documents for SEO.
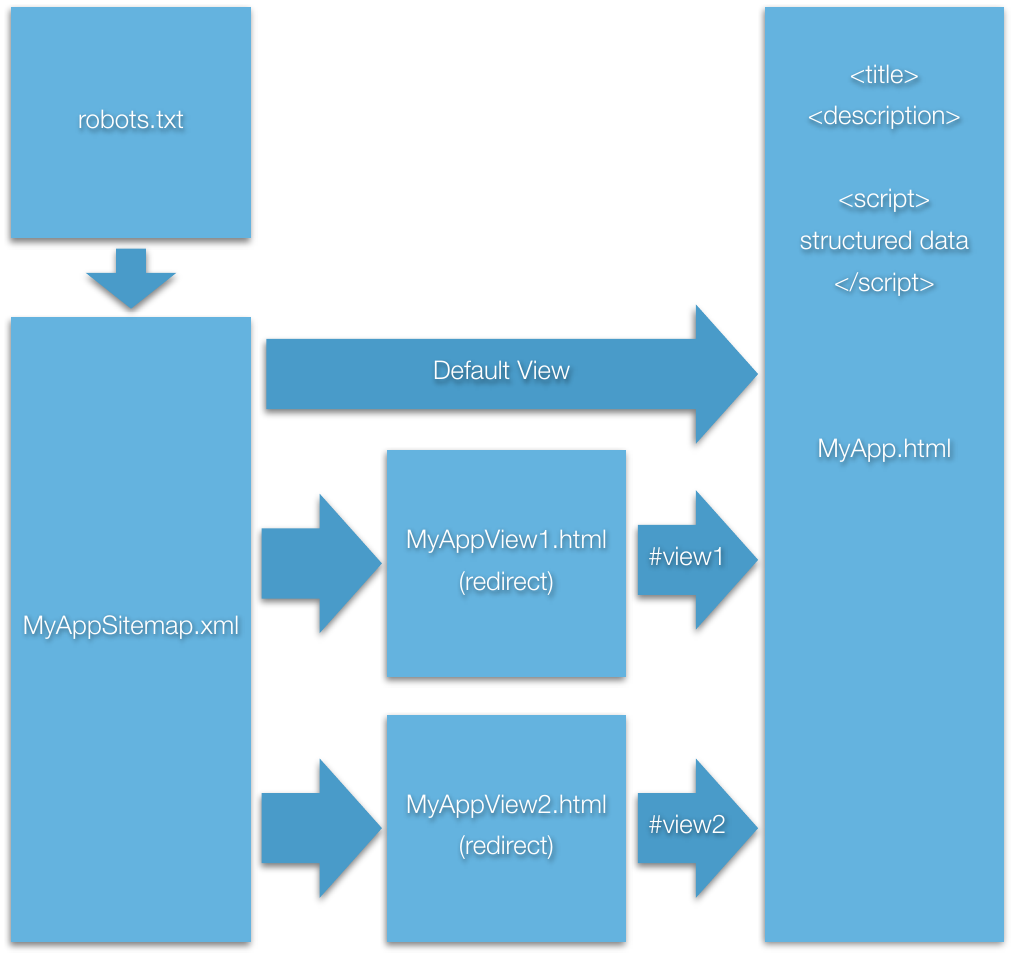
Figure X - ReactJava AutoGenerated Documents for SEO
robots.txt
A robots.txt file is generated which identifies the application sitemap file.
Sitemap
A sitemap file is generated which identifies the main application html file, along with an additional entry for each ancillary view/route, targeting a corresponding redirect html.
Redirect HTMLs
Each redirect html targets the application html file with an associated hash value corresponding to the ancillary view.
Head Title and Description Tags
Unique title and meta description tags for each view is automatically inserted into the application document as the corresponding view is selected. These are key to achieving good search engine results for each of the application views.
Structured Data
Structured data is automatically inserted into the application document as the corresponding view is selected. This can improve the user experience significantly, and typically enhances search engine results for each of the application views.
SEO API
SEO support is provided by overriding the getSEOInfo() method of the AppComponentTemplate class in your App and providing an SEOInfo instance. You can get the sources to an example here, and see the example in operation here.
import io.react.client.core.react.SEOInfo;
...
/*------------------------------------------------------------------------------

@name       getSEOInfo - get seo information

            Get SEO info. This method is invoked both at compile time and
            runtime.

            The intention is to provide a title, description, and base url for
            the app deployment in order to create a redirect target for each
            hash, along with an associated sitemap and robot.txt file.

@return     SEOInfo instance

                                                                              */
//------------------------------------------------------------------------------
protected SEOInfo getSEOInfo()
{
   SEOInfo seoInfo =
      new SEOInfo(
         "http://www.myapp.com",                  // base deployment url      //

         "view1",                                 // default route path hash  //
         new ArrayList<SEOPageInfo>()
         {{
           add(new SEOPageInfo(
               "view1",                           // view 1 route path hash   //
               "My Application View 1 Title",     // view 1 title             //
               "View1 description w/ keywords")); // view 1 description       //

            add(new SEOPageInfo(
               "view2",                           // view 2 route path hash   //
               "My Application View 2 Title",     // view 2 title             //
               "View2 description w/ keywords")); // view 2 description       //
        }});

   return(seoInfo);
}
ReactJava Built-in Components
A few ReactJava components come built-in that you might find useful. The following sections detail their APIs.
Logon
The Logon component contains support for leveraging a supplied IAuthenticationService provider instance to allow users to create or logon to user accounts.
Import

Props
| Name | Type | Default | Description |
|---|---|---|---|
| authenticationSvc | IAuthenticationService | required | Authentication Service provider instance |
| createAcctEnabled | boolean | false | Whether account creation is enabled |
| labelSignIn | String | 'SIGN IN' | Sign-in button label |
| labelSignUp | String | 'SIGN UP' | Sign-up button label |
| observer | Observer<IUserCredential> | nul | Any Observer instance to be notified of logon result |
Source Code
Logon
Examples
Compile Time Constants
The Constants component provides the ability to declare compile time constants that can be referenced by classes of your web application.
Import

Props
Will accept any passed in with the constructor and export them as public static.
Source Code
Constants
Examples
GeneralPage
GeneralPage is framework comprised of a collection of components that helps in creating web pages that are documentary in nature. Typically an App will only deal with the GeneralPage component itself, while the GeneralPage will draw upon the capabilities of many of the others in the collection.
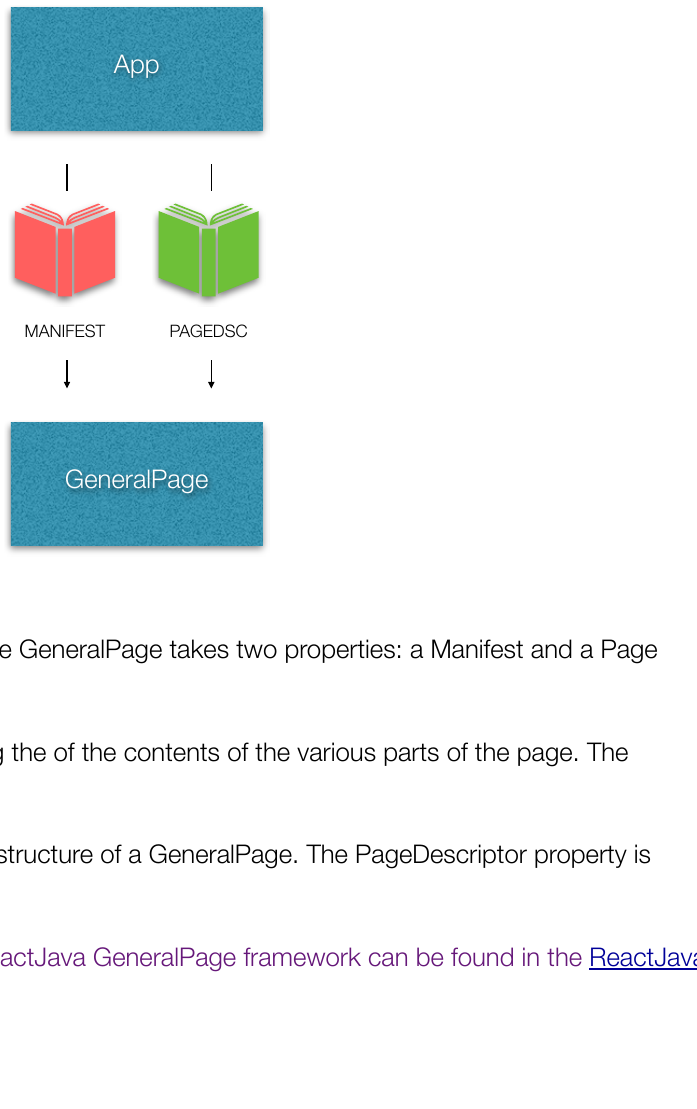
Descriptor.
Manifest property is required.
optional.
Manifest
You can infer how the example manifest below is interpreted to render a GeneralPage instance.
/*=================================================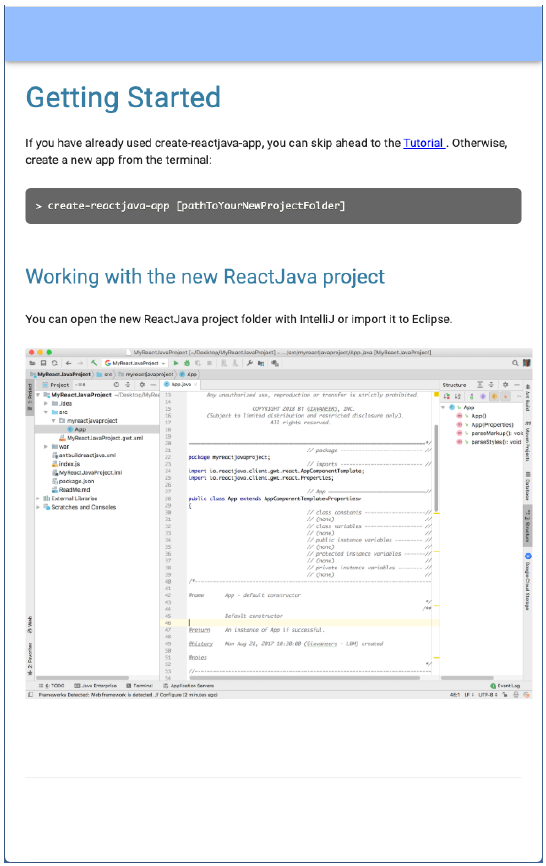
    Getting Started

=================================================*/
.title
Getting Started
.end

.body
If you have already used create-reactjava-app,
you can skip ahead to the
%markup%
<a href="ReactJavaWebsite.html#userGuide">
   Tutorial
</a>
%markup%.
Otherwise, create a new app from the terminal:
.end

.code
> create-reactjava-app [pathToYourNewProjectFolder]
.end

/*=================================================

    Working with the new ReactJava project

=================================================*/
.caption
Working with the new ReactJava project
.end

.body
You can open the new ReactJava project folder with
IntelliJ or import it to Eclipse.
.end

.image
images/WorkingFigure1.png
.end

/*=================================================

    Side Drawer References

=================================================*/      R en dered G e neralPa ge w itho ut a spec ifie d
.reference
<a href="path:userGuide">User Guide</a>
Page Descriptor
.end
.reference
<a href="/javadoc/reactjava/index.html">
   ReactJava API
</a>
.end
.reference
<a href="path:contributorGuide">
   Contributor Guide
</a>
.end
.reference
<a href="http://giavaneers.com">Giavaneers</a>
.end
PageDsc
The PageDescriptor describes the structure of a GeneralPage as follows:
PageDsc                               // page descriptor ---
{
   String       title;                // any page title
   String       image;                // any page title image
   boolean      bMenuButton;          // true iff page includes a menu button
   ButtonDsc[]  appBarButtons;        // any buttons on the appBar
   String[]     pushPaths;            // any router entries
   SectionDsc[] sections;             // any page sections
   FooterDsc    footer;               // any page footer
}

where,

ButtonDsc                             // button descriptor ---
{
   String       text;                 // any button text
   String       url;                  // any button link
}

and,

SectionDsc                            // section descriptor ---
{
   String       title;
   String       subheader;
   String       imagePath;
   String[]     descriptions;
   String       buttonText;
   String       buttonVariant;
}

and,

FooterDsc                             // footer descriptor ---
{
   FooterCreditDsc     credit;        // any footer credit
   FooterCategoryDsc[] categories;    // any footer categories
}

where,

FooterCreditDsc                       // footer credit descriptor ---
{
   String       logo;                 // any credit logo
   String       text;                 // any credit text
}

and,

FooterCategoryDsc                     // footer category descriptor ---
{
   String           title;            // footer category title
   FooterTopicDsc[] topics;           // collection of footer category topics
}

where,

FooterTopicDsc                        // footer topic descriptor ---
{
   String       topic;                // topic title
   String       url;                  // any topic link
   String       target;               // any topic target
}
Components API
A reference to the API of the components of the GeneralPage framework can be found in the ReactJava GeneralPage Developer Guide.
ReactJava Examples
The following table includes all the examples referenced in this guide, along with some additional ones.
| Name | Description | Sources | Demo | |
|---|---|---|---|---|
| bitcoin | An example of registering for realtime notifications of new bitcoin transactions and analyzing and displaying each. | sources | demo | |
| chat | A simple chat app using User Account, Authentication and Database services | sources | demo | |
| database | Common API for Firebase and other cloud based database services | sources | demo | |
| displaycode | Support for display of source code with syntax coloring in a variety of programming languages | sources | demo | |
| googleanalytics | postevent | ReactJava built-in support for Google Analytics trackingId | sources | demo |
| simple | Demonstrates sending various events to Google Analytics | sources | demo | |
| reportdata | Retrieves Google Analytics data | sources | demo | |
| heloworld | The basic example | sources | demo | |
| heloworldsansjsx | The basic example without use of JSX | sources | demo | |
| keyboard | Demonstrates keyboard support | sources | demo | |
| login | Common API for Firebase and other cloud based User Account and Authentication services | sources | demo | |
| materialui | generalpage | The ReactJava General Page framework | sources | demo |
| pricing | A demonstration of the Material-UI component library | sources | demo | |
| theme | ReactJava implementation of themes | sources | demo | |
| routing | How to support multiple views of a Single Page App | sources | demo | |
| seo | Demonstrates use of ReactJava built-in SEO | sources | demo | |
| simple | A very simple App | sources | demo |
| Name | Description | Sources | Demo | |
|---|---|---|---|---|
| statevariable | simple | A basic example of useState | sources | demo |
| handlerbyreference | The simple example using the handler by reference | sources | demo | |
| twosquares | Two views managed by state variable | sources | demo | |
| twosquaresonefile | Two views where al classes are in one file | sources | demo | |
| textfield | Demonstrates using a TextField component | sources | demo | |
| threebythree | step01 | A simple start to an example in ten steps | sources | demo |
| step02 | Adding CSS: CSS Selector for Class | sources | demo | |
| Adding CSS: CSS Selector for Element Id | sources | demo | ||
| Adding CSS: Mixing CSS Selector Types | sources | demo | ||
| step03 | Centering the Square on the Screen | sources | demo | |
| step04 | Centering the Square within a Column | sources | demo | |
| step05 | Centering the Square with Material-UI Grid | sources | demo | |
| step06 | Making the App Responsive | sources | demo | |
| step07 | Adding Consistency by Using a Theme | sources | demo | |
| step08 | Adding Interactivity with a Click Handler | sources | demo | |
| step09 | Add Nine Squares to a Board | sources | demo | |
| step10 | HttpClient: Getting a Color from the Cloud | sources | demo | |
| components | Custom Components and Properties | sources | demo | |
| A Board Component | sources | demo | ||
| The Square as a Custom Component | sources | demo | ||
| state | Managing Component State: the square by render() | sources | demo | |
| Managing Component State: the square by renderCSS() | sources | demo | ||
| progress | Managing Component State: showing a progress indicator | sources | demo |
| Name | Description | Sources | Demo | |
|---|---|---|---|---|
| tictactoe | A simple implementation of tic tac toe. | sources | demo | |
| timer | How to use a timer. | sources | demo | |
| useeffect | Demonstrates the UseEffect hook | sources | demo | |
| useref | Demonstrates the UseRef hook | sources | demo | |
| websockets | Demonstrates use of websockets | sources | demo |
Deploying the ReactJava App
There are a number of ways to deploy a ReactJava App. ISPs and Cloud Service Platforms provide different types of support, generally falling into two categories: dynamic services and static services. Dynamic services are those that leverage an active web server of some sort, such as Apache or Google App Engine. Static services are typically simple network file services, such as Google Cloud Storage, Firebase or AWS S3. Dynamic services are typically a bit more complicated to setup and can cost a bit more, but usually not much more. Static services are very simple to setup and cost little to nothing.
At the time of this writing, Google generally recommends React deployment through dynamic services, mainly to make it easier to achieve effective SEO. With ReactJava's built-in SEO support however, static deployment can be both effective and easy.
We recommend deploying to Firebase since it supports secure URLs (https reather than http) while Google Cloud Storage does not, but if that's not important to you, you might find deploying to Google Cloud Storage a bit easier.
Deploying to Google Cloud Storage
Deployment to Google Cloud Storage is as simple as dragging your ReactJava App files and dropping them onto your Google Cloud Storage bucket. Assign a single configuration parameter on your bucket and that's it, your ReactJava App is active on the web. Let's go through the steps to get your bucket and deploy your app.
Establishing a Domain
You'll probably want to have your own domain for your App. It's simple to setup with virtually any ISP such as Google, GoDaddy, and many others. To do so, follow the simple instructions the ISP provides. Establishing a domain with Google makes the subsequent steps especially easy, but any of them will work fine.
Proving Your Domain Ownership
Before you can use your domain name with Google Cloud Storage, you have to prove you own it.
Copying Your Web App Files
Before you can use your domain name with Google Cloud Storage, you have to prove you own it.
Configuring Your Deployment Bucket
Before you can use your domain name with Google Cloud Storage, you have to prove you own it.
Limitations of Deploying to Google Cloud Storage
Although very easy and inexpensive, A website deployed to Google Cloud Storage may not be deployed to a secure url (https). This is not always a significant problem, but it is generally preferable to deploy to a secure url. Firebase provides an inexpensive solution that is almost as easy to deploy.
Deploying to Firebase
Unlike Google Cloud Storage, Firebase supports deployment of a ReactJava App to a secure url. It leverages the Firebase CLI to deploy your project files from your computer. Let's go through the steps to deploy your App.
Creating a Firebase Project
Before you can deploy to Firebase, you need to create a Firebase Project and then register your App. Follow the directions provided in the Firebase documentation.
Install and Configure the Firebase CLI
Use npm to install the Firebase CLI. From the terminal tab in your IntelliJ project,
> npm i firebase-toolsThen initialize Firebase hosting support.
>Choose to 'Use an Existing Project' and then you will be asked to choose your Firebase project from among any others you may have created.
Next you will be asked to specify your 'public' folder which will be used to deploy from. You should specify the '..._war_exploded' directory within your out/artifacts directory.
? What do you want to use as your public directory? out/artifacts/MyProject_war_explodedThen you will be asked whether you wish to configure as a Single Page App. Say yes.
? Configure as a single-page app (rewrite all urls to /index.html)? (y/N) yThen you will be asked whether you wish to set up automatic builds and deploys with GitHub. Say no.
? Configure as a single-page app (rewrite all urls to /index.html)? (y/N) NOnce configuration is complete, two new files will be written to your project directory: '.firebaserc' and 'firebase.json', and '.gitignore' will be edited to include firebase information.
Modifying firebase.json
Many hosting behaviors of your deployed app can be configured by editing the autogenerated "firebase.json" file. There is one change you will typically need to make.
The default behavior assumes your base WebApp html file is named "index.html". By default, the name of a ReactJava base html file is not "index.html", but is the same as your project name. To accommodate the difference, assuming your base WebApp html file is named "MyProject.html", edit the autogenerated "firebase.json" file from
  {
    "hosting":
    {
      "public": "out/artifacts/PlatformsWebsite_war_exploded",

      "ignore": ["firebase.json","**/.*","**/node_modules/**"],

      "rewrites": [{"source": "**","destination": "/index.html"}]

    }
  }
to
  {
    "hosting":
    {
      "public": "out/artifacts/PlatformsWebsite_war_exploded",

      "ignore": ["firebase.json", "**/.*", "**/node_modules/**"],

      "rewrites": [{"source": "**","destination": "/MyProject.html"}]
    }
  }
The syntax is interpreted as follows:
| public | Specifies the directory to deploy (e.g., public, build, or dist) |
|---|---|
| ignore | Array of file patterns to exclude from deployment |
| rewrites | Redirects incoming requests to a specific file (useful for Single Page Applications) |
| * | matches any file in the reference directory |
| ** | matches any directory, including subdirectories |
| .* | matches files or directories starting with a dot |
| **/.* | matches al hidden files or directories across any directory level |
| **/node_modules/** | matches the node_modules directory and al its contents, regardless of its location |
| Note | !... (negation) rules in the ignore section do not work |
Deploying Your App
Use the Firebase CLI from the project terminal tab to deploy your app to the default hosting sites, [projectId].web.app and [projectId].firebaseapp.com as described in the Firebase documentation.
  > firebase deploy --only hosting --debug
  > firebase deploy --only hosting:mysitename --debug
The first deploys all sites of the project, while the second only deploys the named site.
Once deployed, view your app in your browser at both
https://[projectId].web.app/MyProject.html
and https://[projectId].firebaseapp.com/MyProject.html
Whenever you deploy your app, either the first time or subsequently on updating, if viewing with Chrome, make sure you 'Delete Browing Data... and specify 'Cached images and file', all other data need not be deleted.
Afterwards, you can also deploy to your custom domain as described in the following section.
If you encounter an authorization error when trying to deploy an update to your firebase project, it may be due to an expired OAuth token. Try logging out of your firebase account and then logging back in to go through the Google Account Authorization Screens to update you OAuth token:
  > firebase logout

  > firebase loginDeploying More Than One App from a Project
If your project contains more than one ReactJava App, you will need to create a unique Firebase project for each. Then use the Firebase CLI to register an alias for each of them:
> firebase use --addThis command prompts you to select a Firebase project and assign a project alias. Alias assignments are written to the .firebase.rc file inside your project directory.
At any time, you can switch which of the projects to be used as the default:
> firebase use [project alias]When you want to deploy, you can also specify a specific project rather than the default:
> firebase deploy --project=[project alias]Specifying Your Custom Domain
Follow the Firebase instructions for adding your custom domain to your Firebase project, proving your domain ownership, and then going live.
Example Setup
The following is a DNS setup and associated Firebase Hosting configuration for a custom domain. The DNS setup is with GoDaddy, but all service providers present an equivalent.
The intention is to not only have Firebase serve access to the custom domain, but also to have the "www" subdomain be served with the same http/https content as the domain itself.
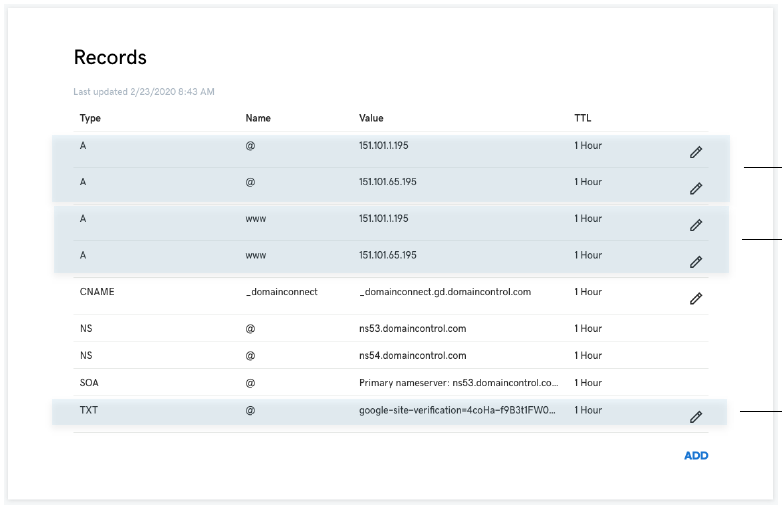
protocol://domain served by firebase
protocol://www.domain served by firebase
domain ownership verification token used by firebase
Internet Service Provider DNS Records
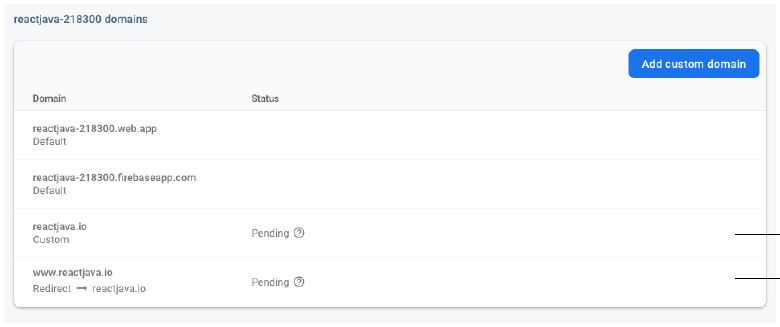
custom domain served by firebase
subdomain redirected to domain
Configuration in Firebase Console
Deploying as a Progressive Web App (PWA)
ReactJava has built-in support allowing you to deploy your application as a Progressive Web Application (PWA). As such, your application can be installed as any other mobile app, complete with a launch icon on the mobile desktop just like all the other apps found there. It can also be installed to your desktop Mac or Windows machine just like any other desktop application.
Five items are required to allow any ReactJava application to be installed as a PWA: you must add some specific <meta> and <link> entries to the <head> section of your application HTML file, you must provide a PWA Manifest file in your project tree, you must provide one or more icon image files to your project tree, you must supply a 'service worker' javascript file to your project tree, and you must add a small javascript snippet to the head section of your application HTML file to bind your 'service worker' javascript file. The following sections describe how to do each in detail.
App HTML File Meta and Link Entries
A variety of <meta> and<link> entries must be included in the <head> section of your application HTML file. ReactJava will automatically supply you with default entries, but you can modify them in accordance with changes you make to the default Manifest file. You can use it as is, or edit it to suit your preferences with the help of a variety of reference aids available on the web.
The PWA Manifest File
The web app manifest is a JSON file that defines how the PWA should be treated as an installed application, including the look and feel and basic behavior within the operating system. It is called "manifest.json" and is placed at the same location as the application HTML file.
ReactJava supplies a default manifest file for every application. You may find the same reference aids used to modify the default Manifest file may be helpful.
Application Icon Image Files
At least one icon image file is required for a PWA to be installable. Typically, it is best to supply four image files, one at each of the following resolutions: 192x192, 384x384, 512x512, and 1024x1024. ReactJava will automatically supply you with four generic icon image files. You'll want to replace those with ones that are representative of your specific application.
Service Worker Javascript File
Every PWA must include a javascript file which implements a Service Worker. ReactJava supplies a default Service Worker javascript file called "serviceworker.js" placed at the same location as the application HTML file. It is very basic and can be enhanced to meet specific needs.
Service Worker Registration
In order to be installable, every PWA must register its support for a Service Worker. Registeration is by means of a javascript snippet in the <head> section of the application HTLM file, which links the app to a Service Worker javascript file. ReactJava supplies your app with a default javascript snippet registering the default Service Worker javascript file.
Summary of Requirements to Deploy a ReactJava PWA
As detailed in the previous sections, ReactJava will automatically supply you with default implementations of everything you need to deploy your application as a PWA. At a minimum however, you'll likely want to include custom replacements for the default application icon files.
Once you have deployed your PWA to the web, as detailed in the Deploying to Firebase section for example, you are ready to install it as a mobile device application or desktop application as described in the following sections.
Installing Your PWA on a Mobile Device
A PWA can only be installed on iOS using the Safari web browser. First, navigate to the site in Safari. Press the "Share" button and select "Add to Home Screen" from near the bottom of the popup. Lastly, tap "Add" in the top right corner to finish installing the PWA.
Accommodating PWA Changes to a Mobile App
If you want to update your PWA on your iPhone to accommodate changes made, uninstall the PWA in the following two steps:
1. Delete the PWA from the Desktop screen as you would any other mobile app.
2. Clear your cookies and keep your history by going to Settings > Safari > Advanced > com.giavaneers.website.Website Data, then tap Remove All com.giavaneers.website.Website Data. Alternatively, you can clear your history and cookies, by going to Settings > Safari, and tap Clear History and com.giavaneers.website.Website Data.
Once done, reinstall the PWA as described earlier.
Installing Your PWA on a Desktop Computer
Once your PWA has been published to the web, it can be installed as a regular app on your desktop computer. On Mac, navigate to the app on Google Chrome as shown in the figure below:
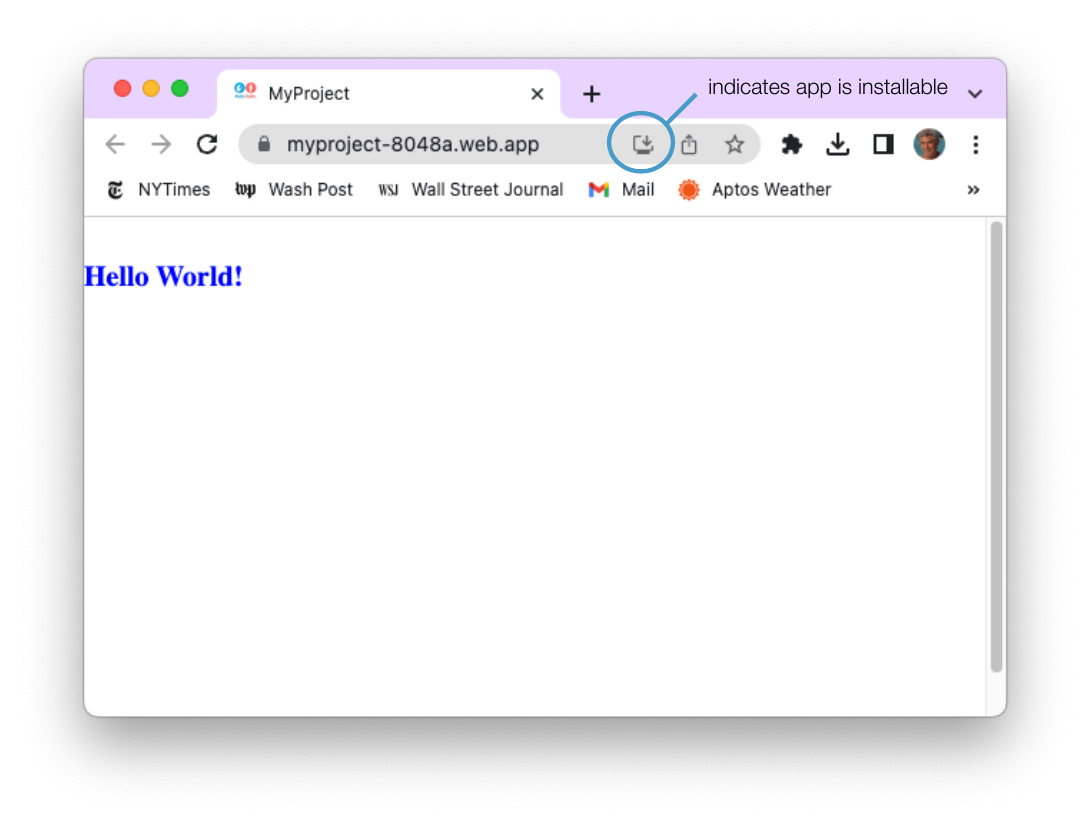
If all has gone well, and your app is installable, an icon will appear to the right of the navigation bar.
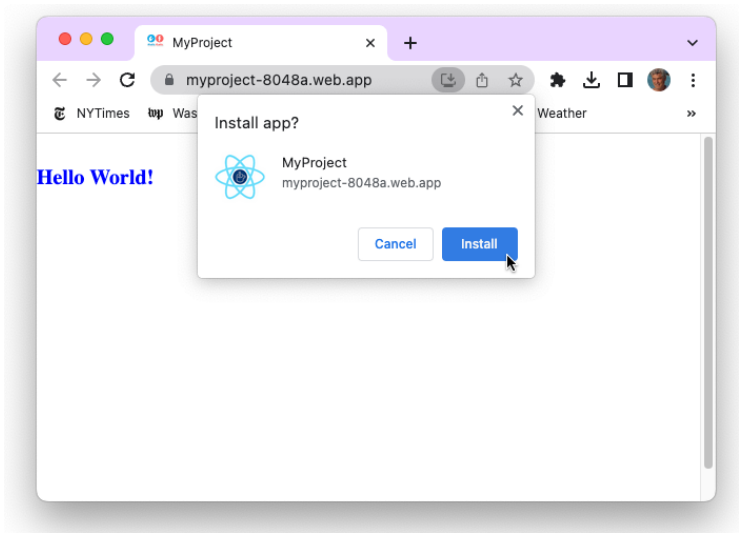
Click on the icon and press the 'Install' button.
You will be presented with your app display screen.
You will find your app in Applications/Chrome Apps.
And then you can move it to the Dock or anywhere else if you want.
Accommodating PWA Changes to a Desktop App
If you want to update your PWA on your desktop Mac to accommodate changes made, uninstall the PWA in the following two steps:
1. From Google Chrome, enter "chrome://apps/" in the address bar and right-click on the app icon and select "Remove from Chrome..."
2. Clear the Chrome browser cache.
Once done, reinstall the PWA as described earlier.
Additional Notes
Browser debugging
Keep your normal browser updated. If an IDE debugger stops connecting, first check the supported IDE/plugin/browser combination and reproduce the issue in a clean test profile. Report the versions and a minimal example to Giavaneers.
The historical instructions for downloading an old browser from a third party and disabling automatic security updates have been removed. Do not remove or disable the update mechanism of your everyday browser.
History
15 Aug, 2018 Initial draft. (LBM - Brian McGann, Giavaneers, Inc.)
12 Oct, 2018 Added Getting Started section. (LBM)
17 Oct, 2018 Reworked the Getting Started section to have users install Node manually, rather than the integrated mode that works for Mac installations. (LBM)
26 Oct, 2018 Documented new npm login credentials and instructions for updating an existing project. (LBM)
27 Oct, 2018 Documented ThreeByThree example. (LBM)
13 Nov, 2018 Documented use of Grommet. (LBM)
11 Dec, 2018 Documented support for declaring the addition of node modules. (LBM)
14 Dec, 2018 Documented support for dynamic routing and enhanced update support for create-reactjava-app. (LBM)
20 May, 2019 Revised Three By Three example. (LBM)
21 Jun, 2019 Added SEO Support and Deployment sections. (LBM)
02 Sep, 2019 Added IntelliJ ReacJava Plugin sections. (LBM)
03 Oct, 2019 Corrected npm command line for installing material-ui. (LBM)
11 Oct, 2019 Updated Three By Three example sources. (LBM)
14 Oct, 2019 Split off last sections into ReactJava Maintenance Guide. (LBM)
31 Oct, 2019 Added sources and access to the working example for Routing. (LBM)
08 Nov, 2019 Updated section on adding custom React component libraries. Pruned some redundant examples. (LBM)
12 Nov, 2019 Added a bit more explanation to the dynamic routing section. (LBM)
7 Dec, 2019 Added Database Support section and placeholders for Timers, Keyboard Support, and User Accounts and Authentication. (LBM)
9 Dec, 2019 Added Timers, Keyboard Support, and User Accounts and Authentication sections. Added remove() functionality to Database Support section. (LBM)
2 Jan, 2020 Added Using Cloud Services section. Enhanced the User Accounts and Authentication, Google Analytics and Database sections. (LBM)
6 Jan, 2020 Added description of how to deploy to Firebase. (LBM)
8 Feb, 2020 Added Introduction and made revisions in preparation for public release. (LBM)
14 Feb, 2020 Added built-in components section. (LBM)
22 Feb, 2020 Added information to the Deploy to Firebase section. (LBM)
26 Feb, 2020 Added section on Hooks. (LBM)
8 Mar, 2020 Added section on specifying App properties. (LBM)
24 Mar, 2020 Added description of Component defaultElementId() method. (LBM)
15 Apr, 2020 Added section on finding a specific component instance as well as describing the built-in tracking of Component mounted state. (LBM)
22 May, 2020 Modified section on adding custom javascripts to use the new getCustomJavascripts() method. (LBM)
15 Aug, 2020 Added the 'as' syntax to specifying a custom jvascript, thereby creating a ReactJava native namespace. (LBM)
22 Aug, 2020 Added the section on exporting shared resources and the specific discussion about exporting custom javascripts. (LBM)
3 Apr, 2021 Added the section on finding an App instance. (LBM)
15 Apr, 2021 Added the section describing the built-in JSON.simple JSON library. (LBM)
02 Dec, 2022 Added the section on assigning the log level at launch time. (LBM)
07 Dec, 2022 Added a section on using the Recharts charting package. (LBM)
27 Dec, 2022 Added a section on adding general files as embedded resources. (LBM)
03 Feb, 2023 Added a section describing how support for various Firebase services are built-in to ReactJava.
10 Feb, 2023 Added section describing deployment as a Progressive Web Application.
10 Mar, 2023 Added section describing how to downgrade the version of Google Chrome in the event javascript debugging stops connecting with the browser.
2 June, 2023 Added a substantial amount of additional information to the User Accounts and Authentication section.
17 May, 2024 Documented restrictions on new Java class and interface package names.
25 Dec, 2024 Added notes on reauthenticating when deploying an updated Firebase project and receiving an Authentication error.